Giving Life to Lifeform…
We’re in the midst of creating 3D animations for our film Lifeform. The software we chose was Blender–a free and open-source 3D computer graphics software product used for creating visual effects. Here at our studio we’re doing the animation, lighting and compositing. Modeling and rigging were handled by talented Blender vets Kevin Hayes and Nathan Taylor, respectively. At last count there were forty–odd (and we do mean odd) 3D fx shots in the film, which, while it doesn’t sound like a lot, is a HUGE amount of work, not to mention render time. Currently we’re averaging a day-and-a-half to two days of render time per shot, so you can imagine how long it’s taking to wade through the list. Still, it’s worth it when you see the results… One of the more interesting facts is that you actually output the animation as a series of still images, .pngs, which you then import into Aftereffects, in order to create an entire animation, who’d have figured that? When we designed the actual creature, I was looking to invest attributes from actual creatures in nature, in order to give it a more authentic feel. Some dinosaur plating here, some praying mantis there, a scorpion tail over here… Now we’re trying to emulate some of the physical movements these creatures make in the real world to bring the illusion home.
One tip I would give to any fledgling animators: don’t forget to use the animation curves to smooth out the model’s movements. You can use the bezier tools to make them less “roller-coaster” like–some of mine were looking like the Cyclone at Coney Island before I smoothed them out!

The goal is to finish all the 3D shots in the next few months and then on to color correcting and sound mix! Ugh…
Mutant Monster Tentacle Attack Scene!
Presented for your edification: a partially completed tentacle attack scene featuring Virginia Logan suddenly sprouting mutant monster tentacles from out of her back and molesting attacking Peter Alexandrou–and who can blame her really? It was a long day on set, afterall. Everyone was cranky!
Actually, we’ve been using Blender to create 3D animated tentacles for these shots. Then we bring them into AfterEffects and combine them with a matte created in Mocha (sounds like we’re making boozy drinks here!) and, voila: instant monster tentacles! Actually, it’s not that instantaneous, but it’s very gratifying to see one’s vision of tentacular (is that a real word?) homicide come to life before one’s eyes.
We combined the computer tentacles with some practical ones on set. For these, we actually had to do reverse shots, which involved wrapping the silicone prop tentacle (made from Smooth-On’s Dragon Skin silicone product) around the actor’s wrists or ankles, greasing them up with KY (who says sets are no fun?) and pulling them off while filming. Then in Final Cut Pro, we reversed these shots so they looked like the tentacles were wrapping around his limbs. I was pleased with how seemless these shots turned out.
What do you think?
tentacle test from Brian Schiavo on Vimeo.
Babes And Blood on Long Island…!
Not. Safe. For Work–I warned you.
Okay, so in-between actually editing our film “Lifeform,” we’ve been putting together two shoots, for additional scenes. Now, the reason for this, I could say, is to add an additional layer of narrative in order to make the film more complex and add more dramatic depth, but the truth is, I just wanted to add more crazy, blood-curdling monster-lovin’ mayhem! Also more beautiful women. Hey, Shakespeare wrote for the groundlings folks, don’t kid yourselves. There’s more stabbings in his work than the average episode of CSI. You know you love it…I just deliver the goods, okay? So, no mea culpas coming from this part of the neighborhood. But I digress…
Yes, in order to add a denser layer of narrative complexity, we went ahead and sculpted a scalping wound for our aforementioned beautiful actresses’ to wear. You can see a few shots of the piece after it was created and we were in the process of adding hair to the gelatin piece–oh yeah, I cast it out of gelatin, the same stuff Bill Cosby used to sell on TV. The great thing about this stuff is that it’s cheap, it looks good on camera and you can re-melt it in your microwave to use it again. We all had Jello Puddin’ Pops after the shoot!


Here’s the effect on the very talented Tatyana Kot–she’s the new screen queen on the block. Our shadowy beast tracks her down and for some reason feels the need to rip her dress off and then pull her scalp off. Hey, it happened in Macbeth didn’t it? Or was it The Merchant of Venice, I can’t remember… All kidding aside, the scene worked like a charm. Tatyana was a consummate professional and Miranda Kahn, who played the creature did a great job. Both are wonderful actresses! The end effect is absolutely chilli ng.
ng.


The next weekend, we shot more mayhem, this time with Tatyana and Jacklyn Sokol in an earlier portion of the scene, as drunken debutantes on their way home, before the assault. Both women were great and…Jackie got to wear a similar headpiece as well–the beast apparently hates blondes. Who can blame it? Thanks to makeup artist Meraly Lopez and Christine Russo for painting and applying the pieces. Also, thanks to Josh Barbour, for helping me crew the shoot!


We also shot scream queen Christina Wood and Tom Rowen’s sequence. They play a pair of lovers caught in the beast’s crosshairs–just like in Hamlet when…aw forget it…

Insect Attack!
One of the problems with having downtime between shoots is that your mind has time to wander down crazy little alleyways and come up with incredible special effects you’re going to actually find a way to implement somehow. For instance, when we decided we had throw in another monster effect because, gee, the film only has about five hundred-or-so scenes of monster disembowlment, we thought: “hey, wouldn’t it be cool if our mutating heroine grows a giant bug arm and kills a hooker with it?” Of course it would be cool!
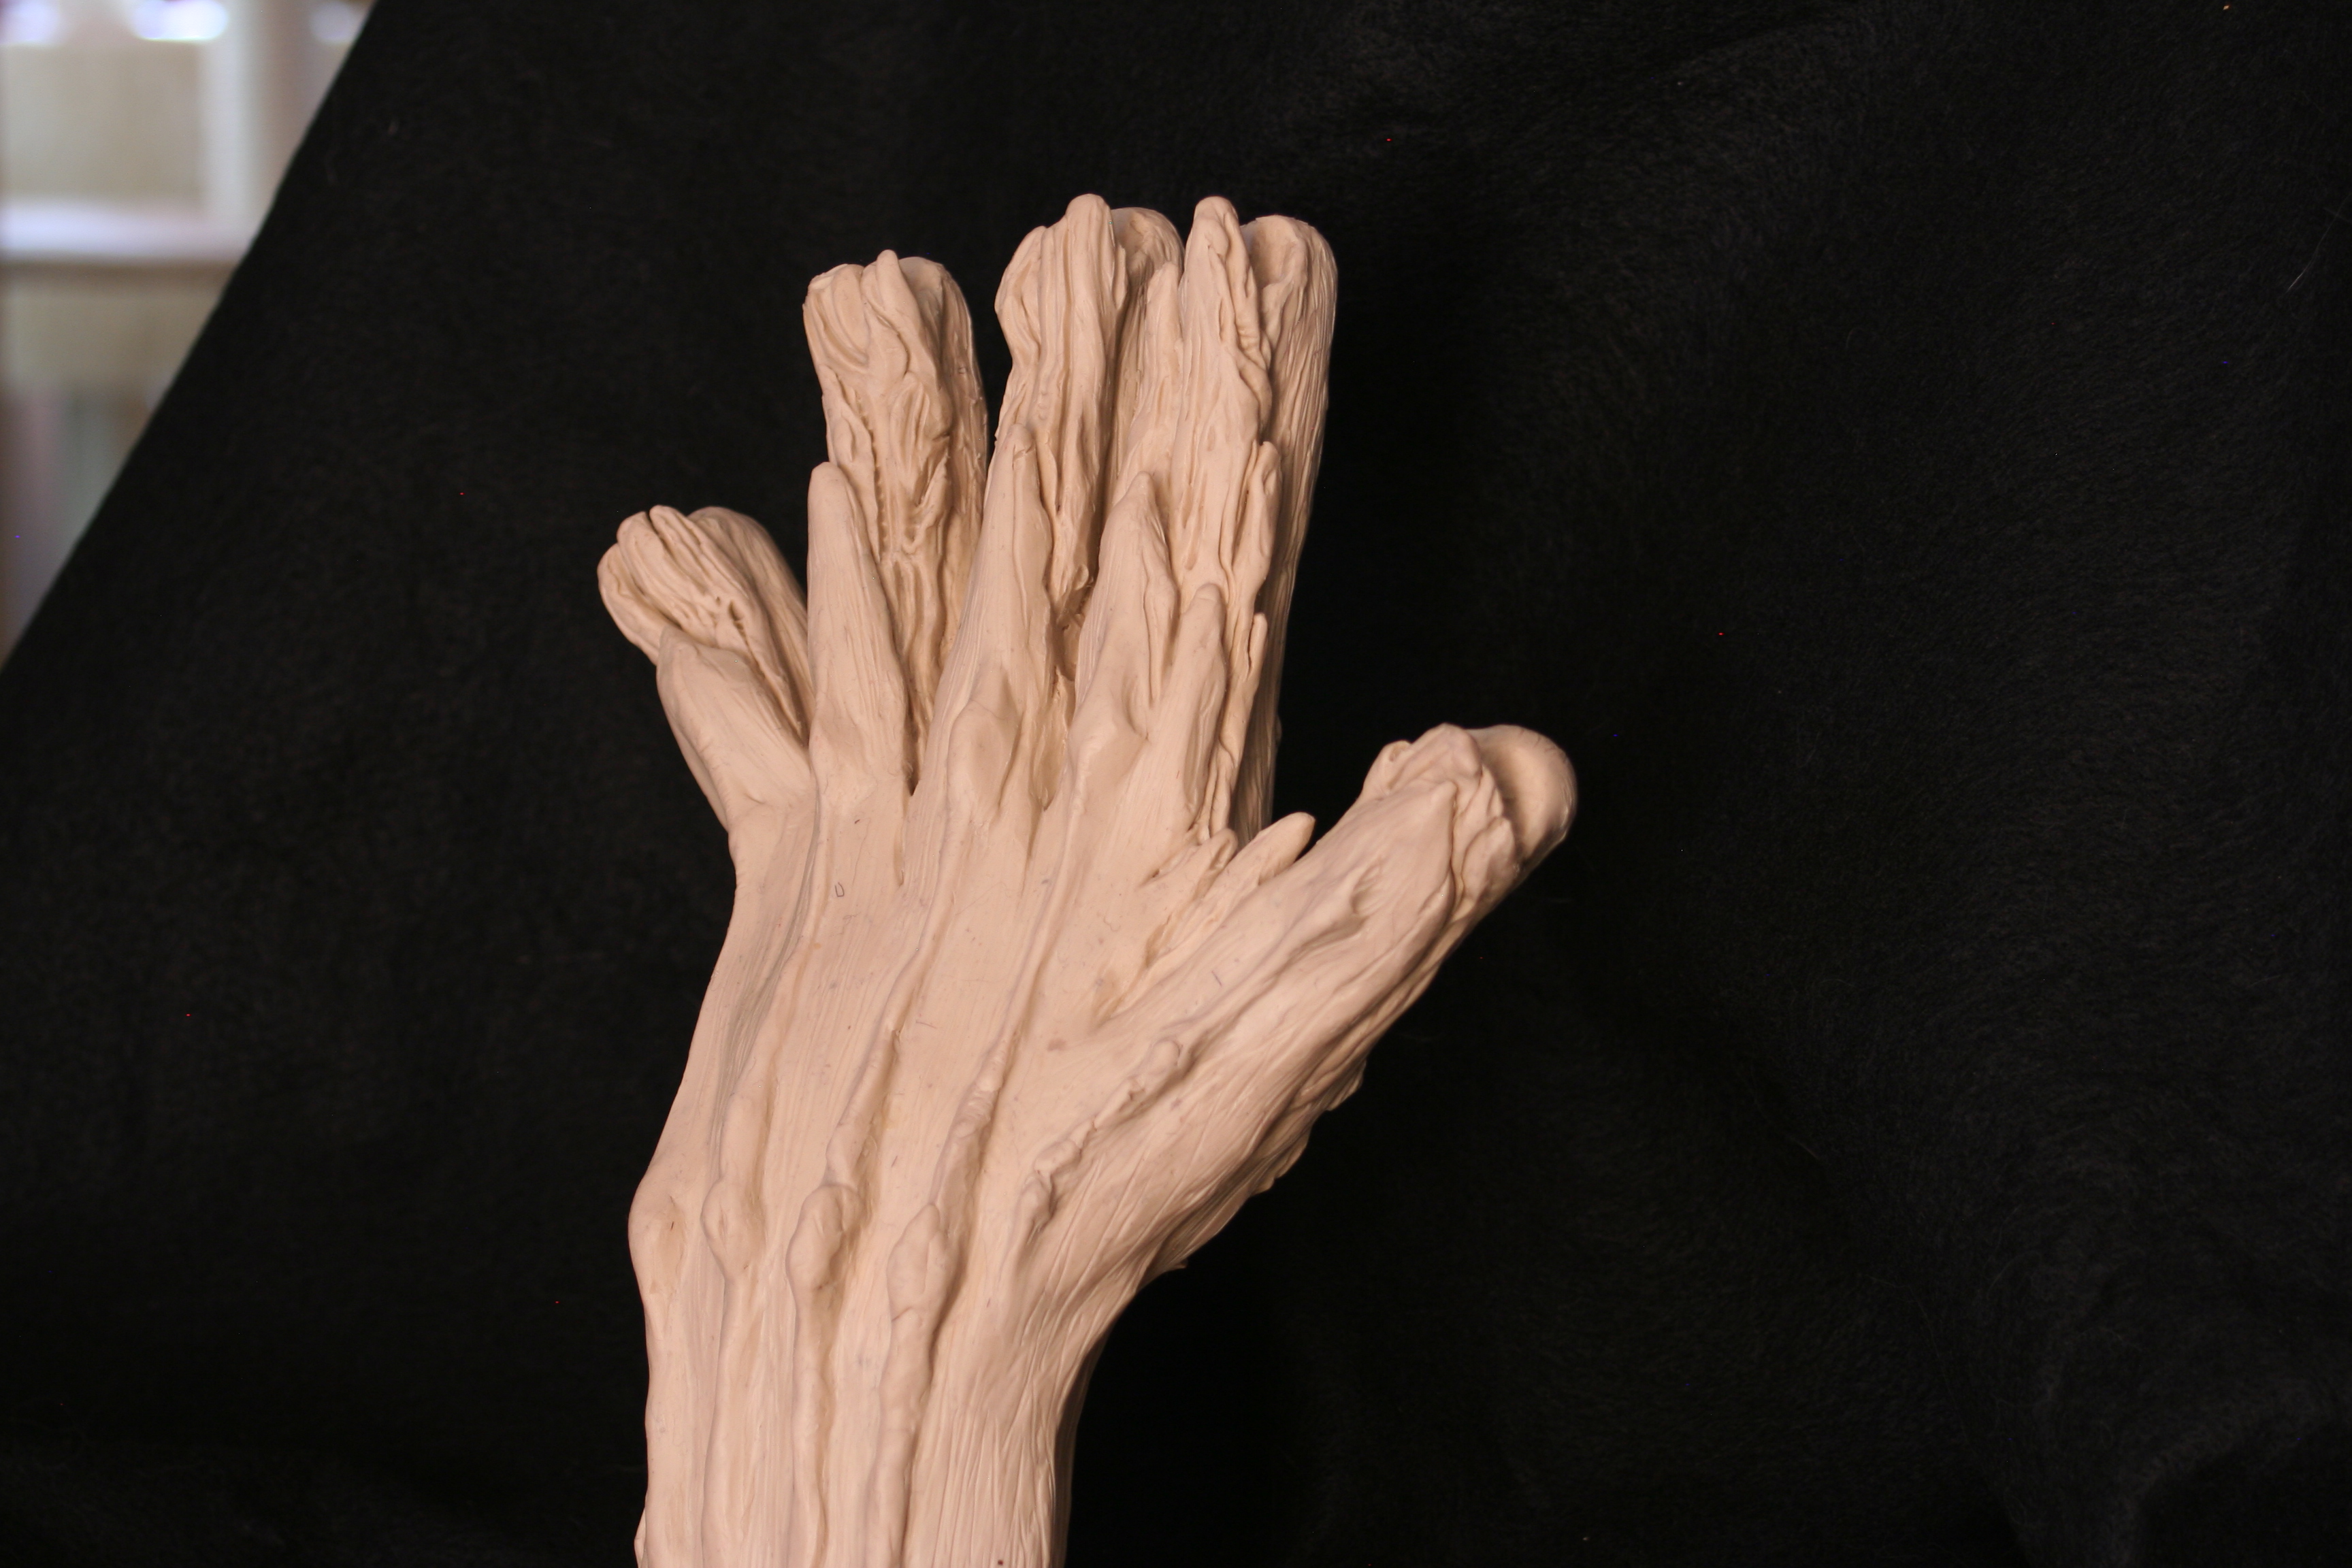
But…how to create said bug arm for our actress–the talented Virginia Logan–to go haywire with? Why the Old School Way, of course! The following shots give you an idea of the process….
First we sculpted a likeness of a bug arm out of plasticene clay, on top of an arm cast of an actress we had in the workshop…
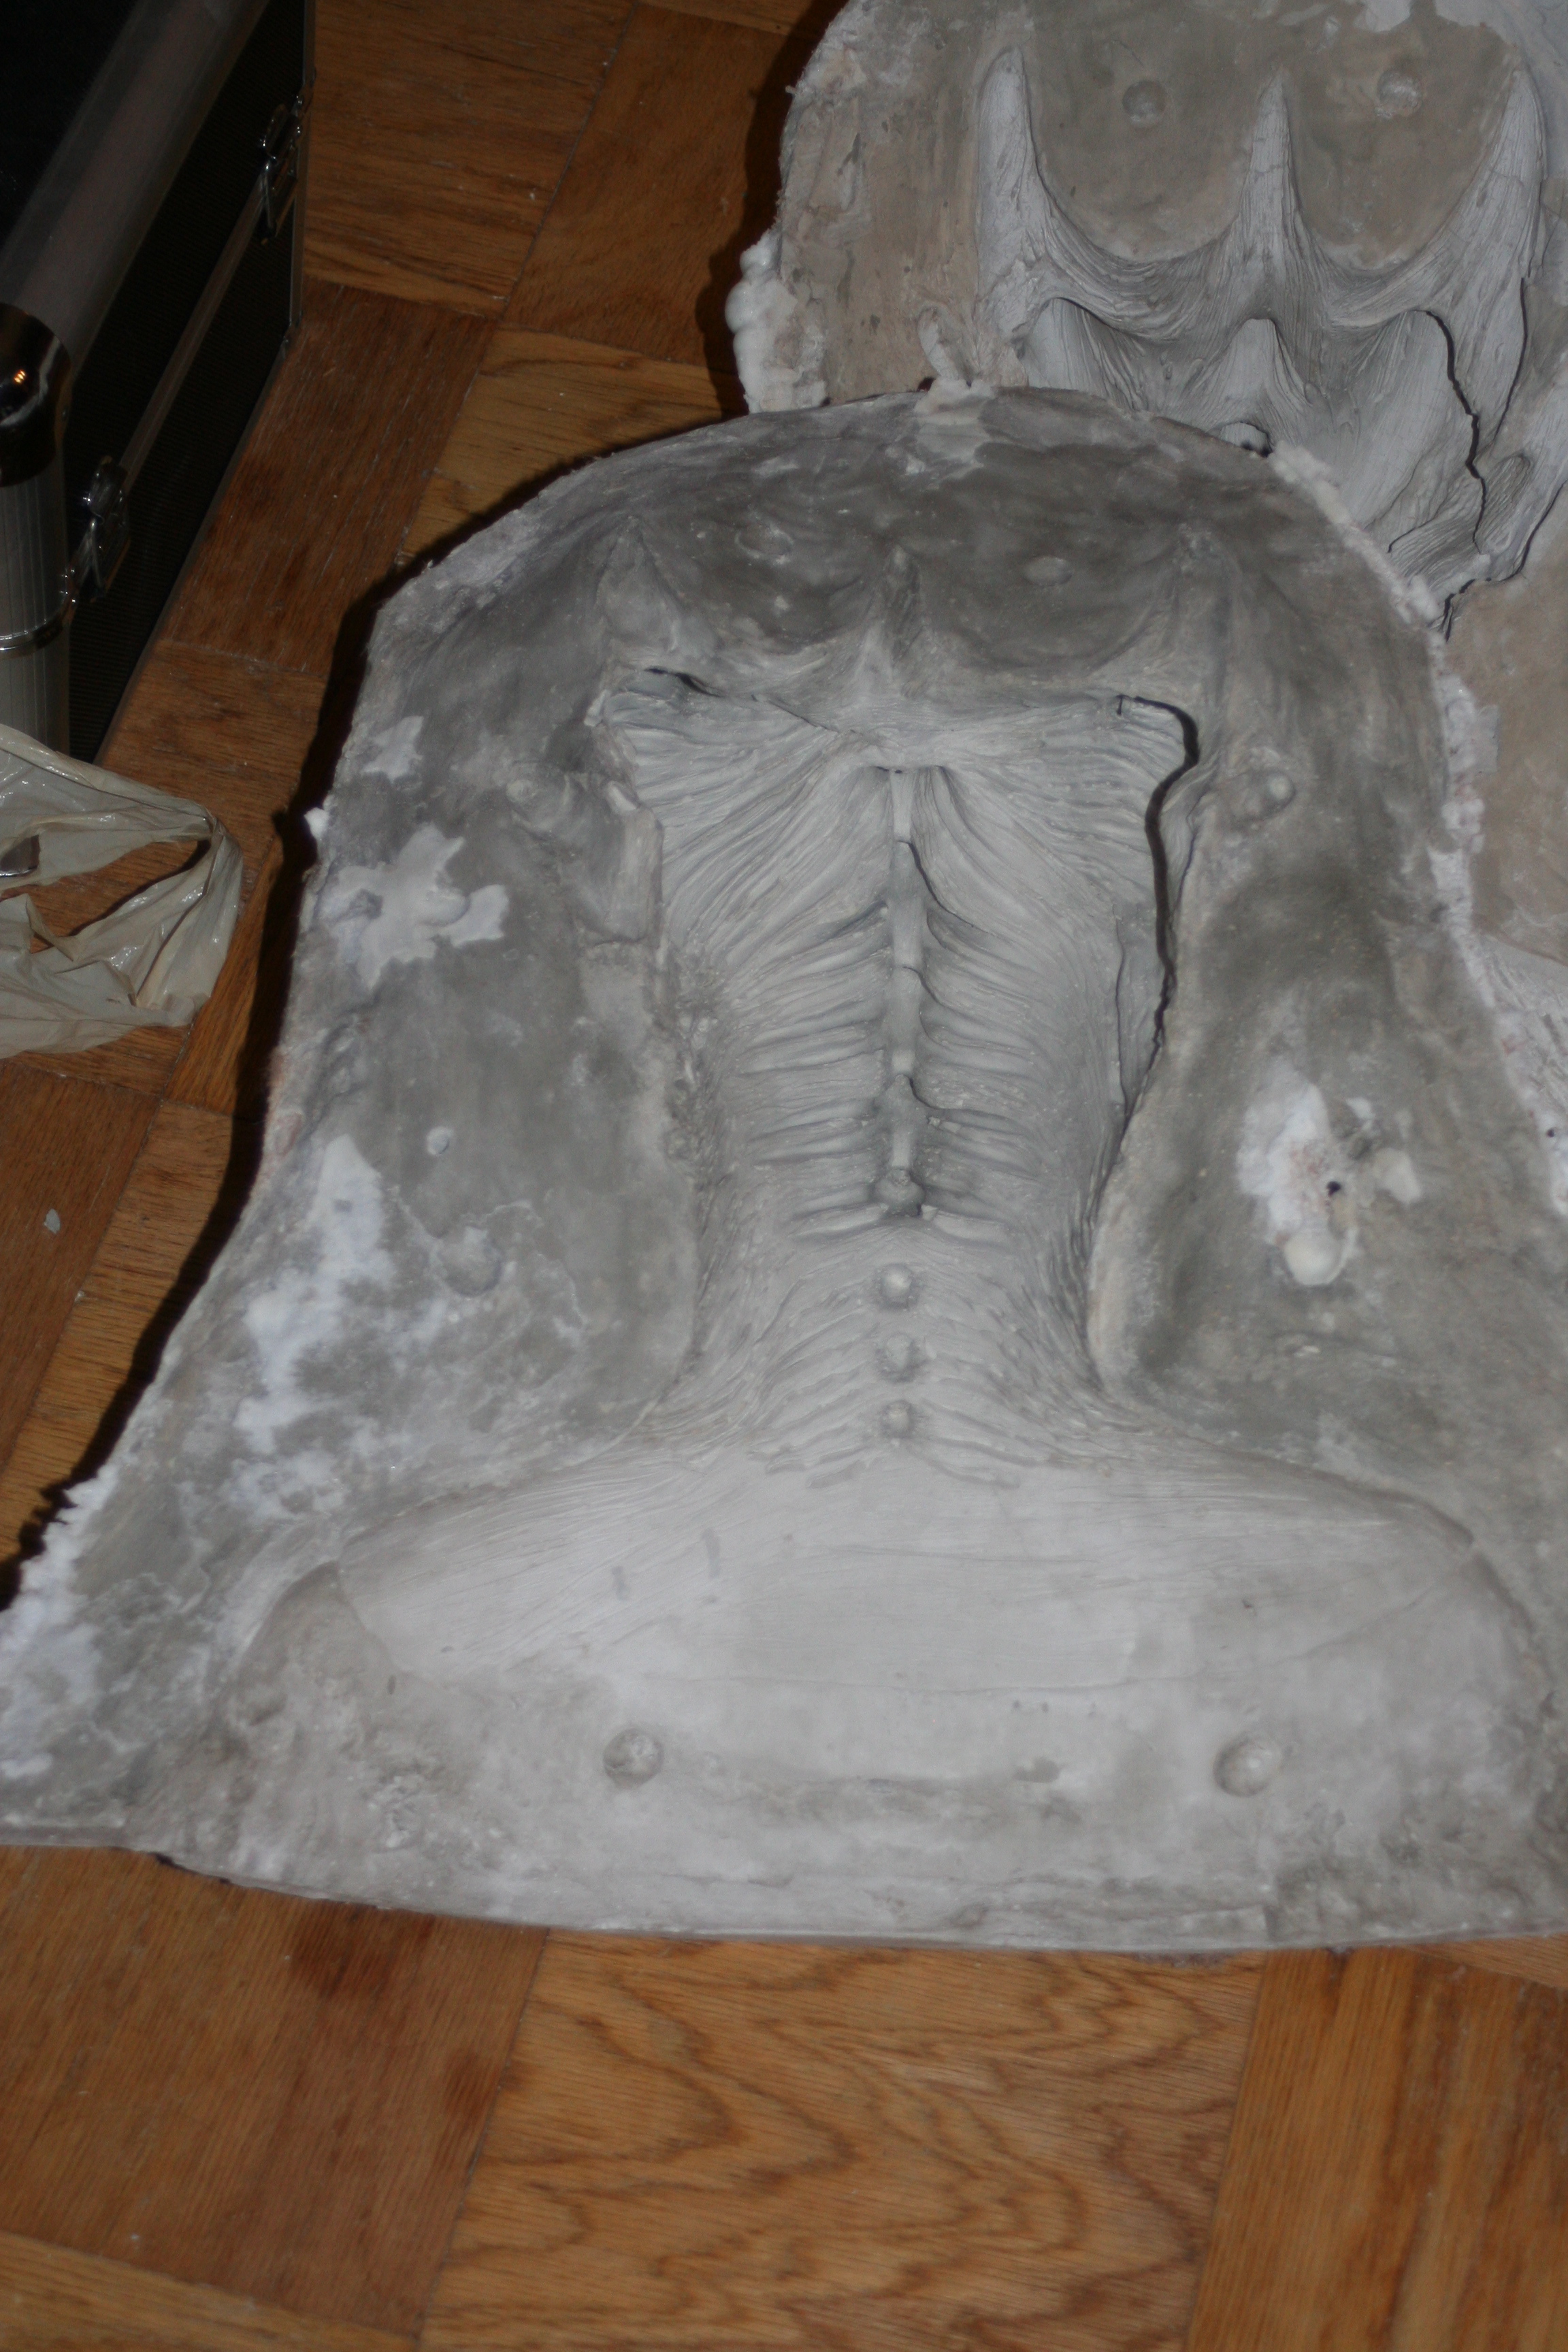
Next, I cast the sculpt in a two-piece ultracal plaster mold….

The key to a successful casting is keeping the first coat of Ultracal thin enough to get all the crazy detail sculpted into the piece–after that you can go crazy with the burlap and Ultracal…

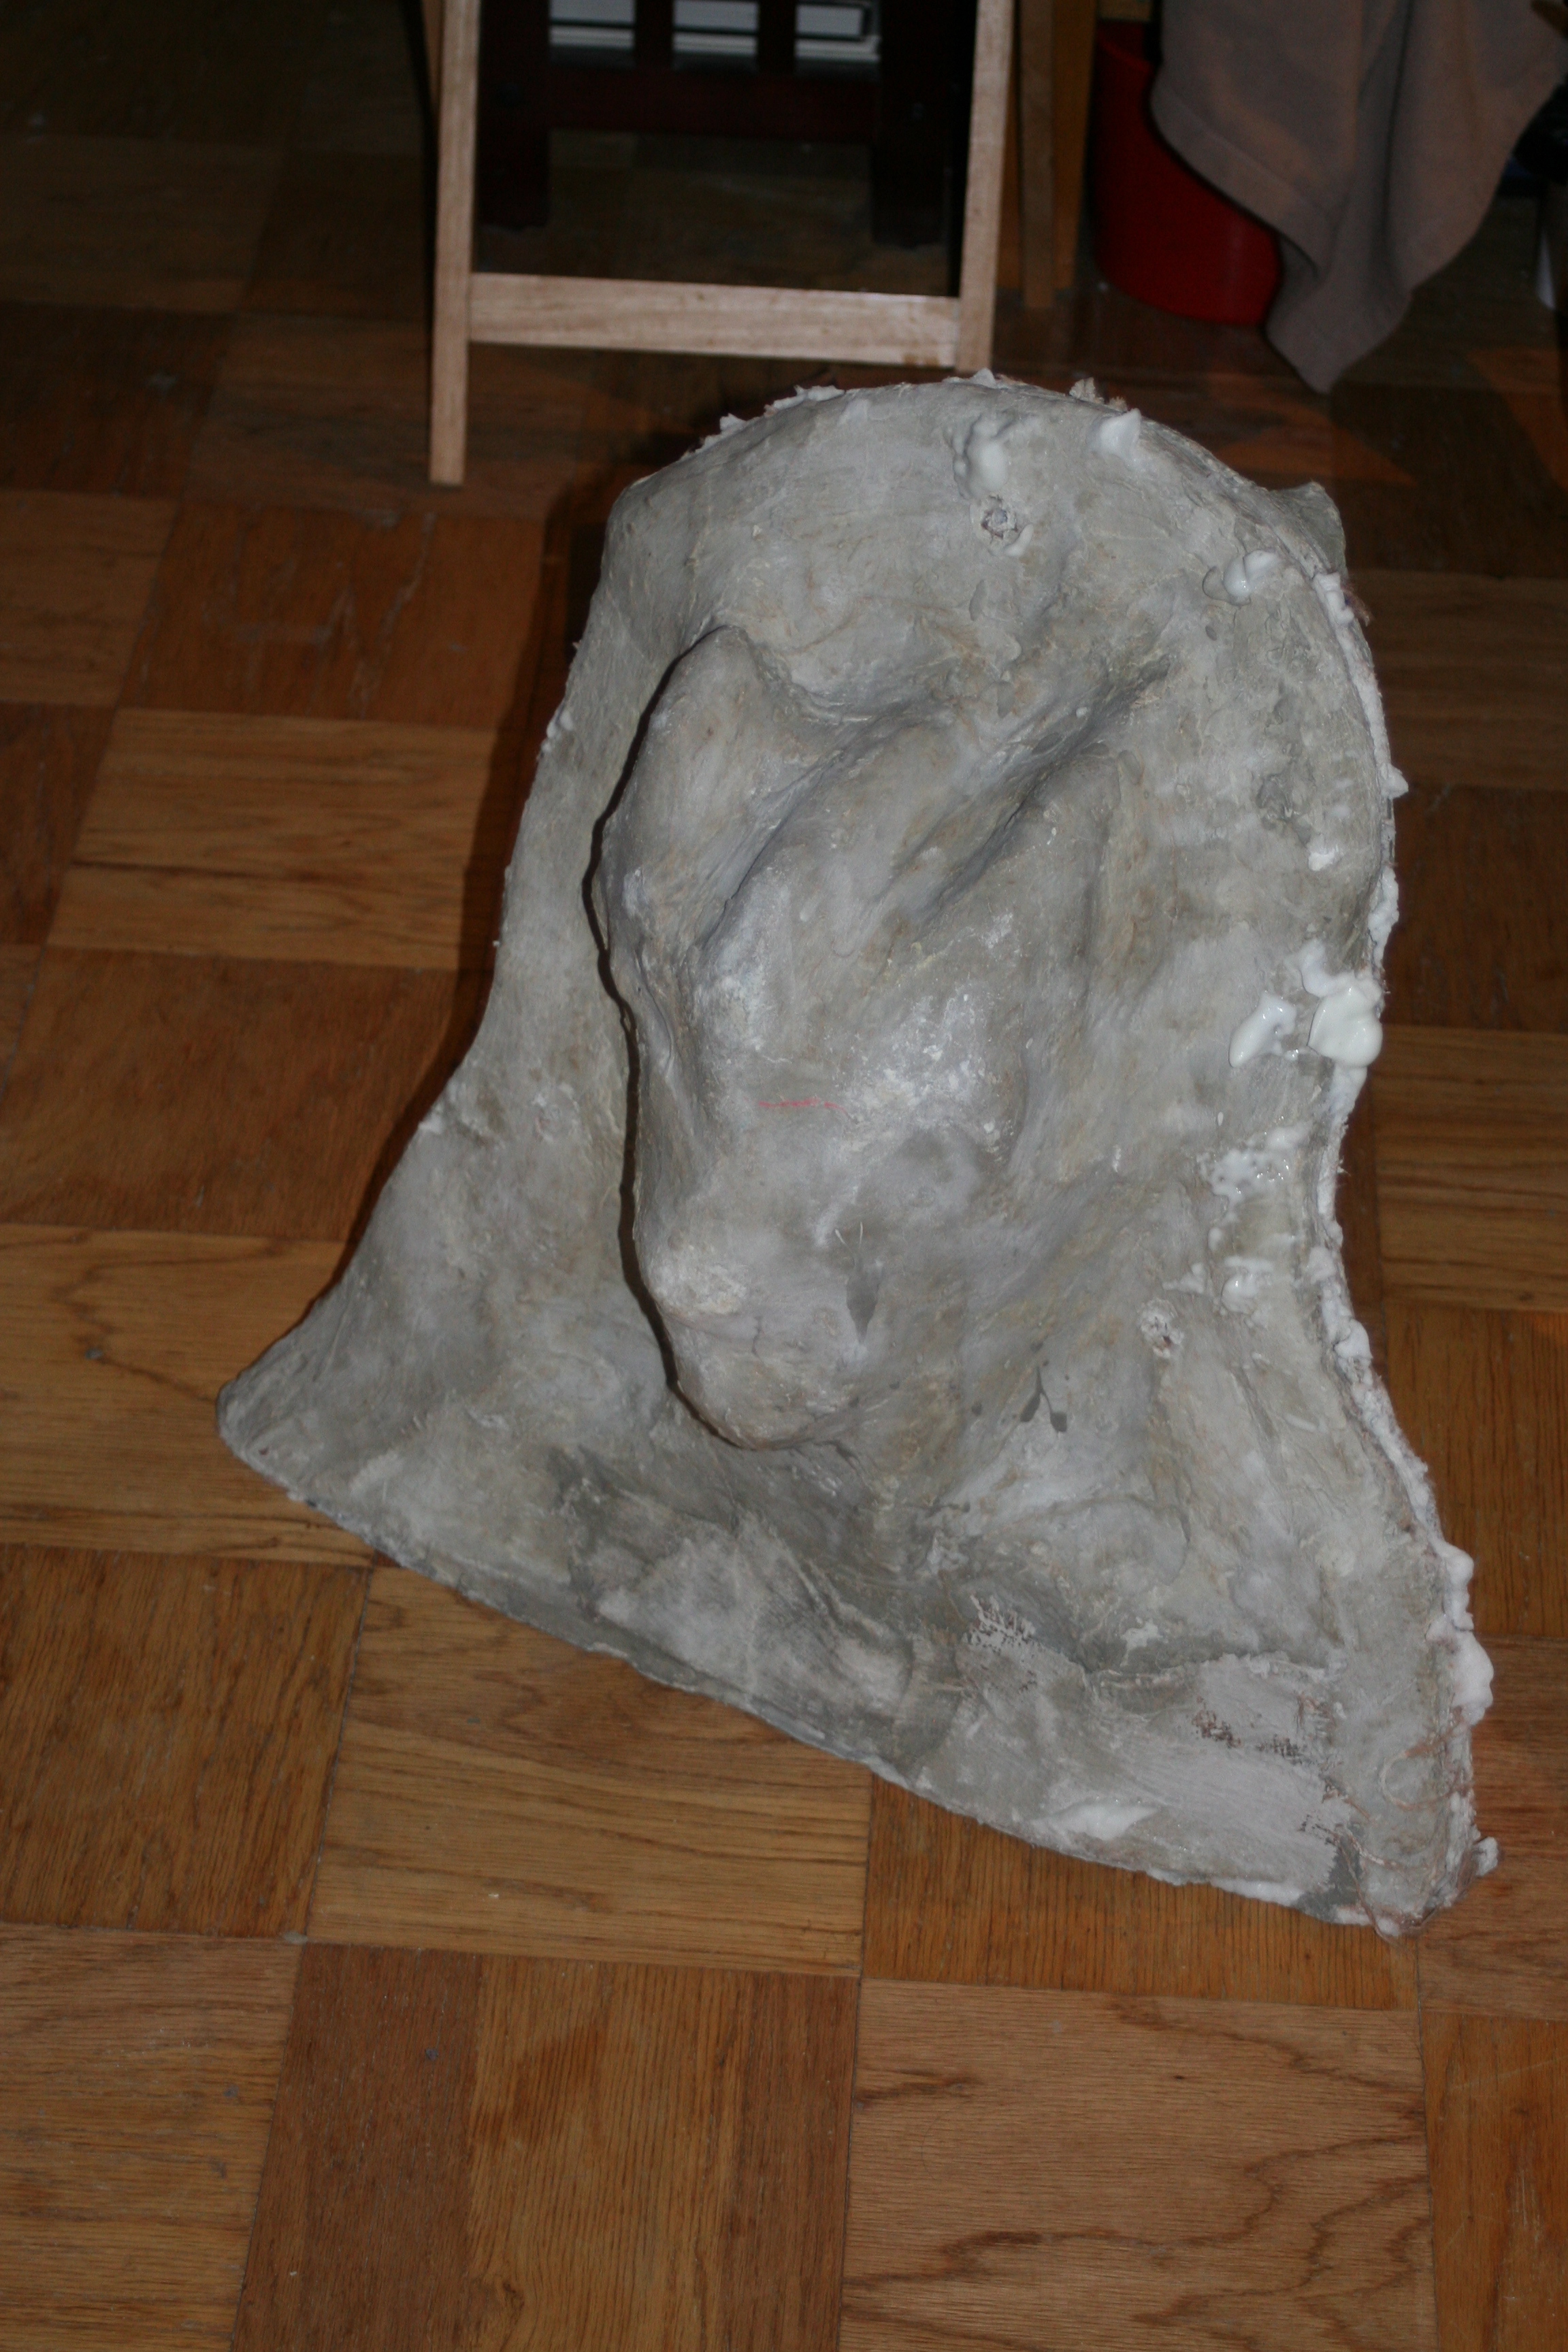
The next step involved slip casting the mold, once it was strapped together tightly. We used rubber mask molding latex–I think it’s #8–which is readily available at The Complete Sculptor here in NYC.
We ultimately did three layers of latex in the mold and used a blow dryer to dry each coat. The picture shows the piece after it was removed from the mold.

Finally, it was painted black, with bug green highlights. For the actual shoot we slathered onplenty of KY jelly, which brought out some nice highlights once it was lit properly. You can see the arm below, on-set, ready for crazy, bugf*ck action…
And here it is, poised for hapless victim slicing action…
In the final shot, Virginia is bringing her chitin insectoid arm to vibrant “life!”

Interestingly, we found an actual praying mantis on set late in the summer and I took a bunch of snapshots of the creature. The actors gave it a pet name at the time, but I can’t remember what it was. It wasn’t too happy to have me pointing the camera lens at it, I remember. I wonder how much this influenced our thinking processes?

It’s Alive!
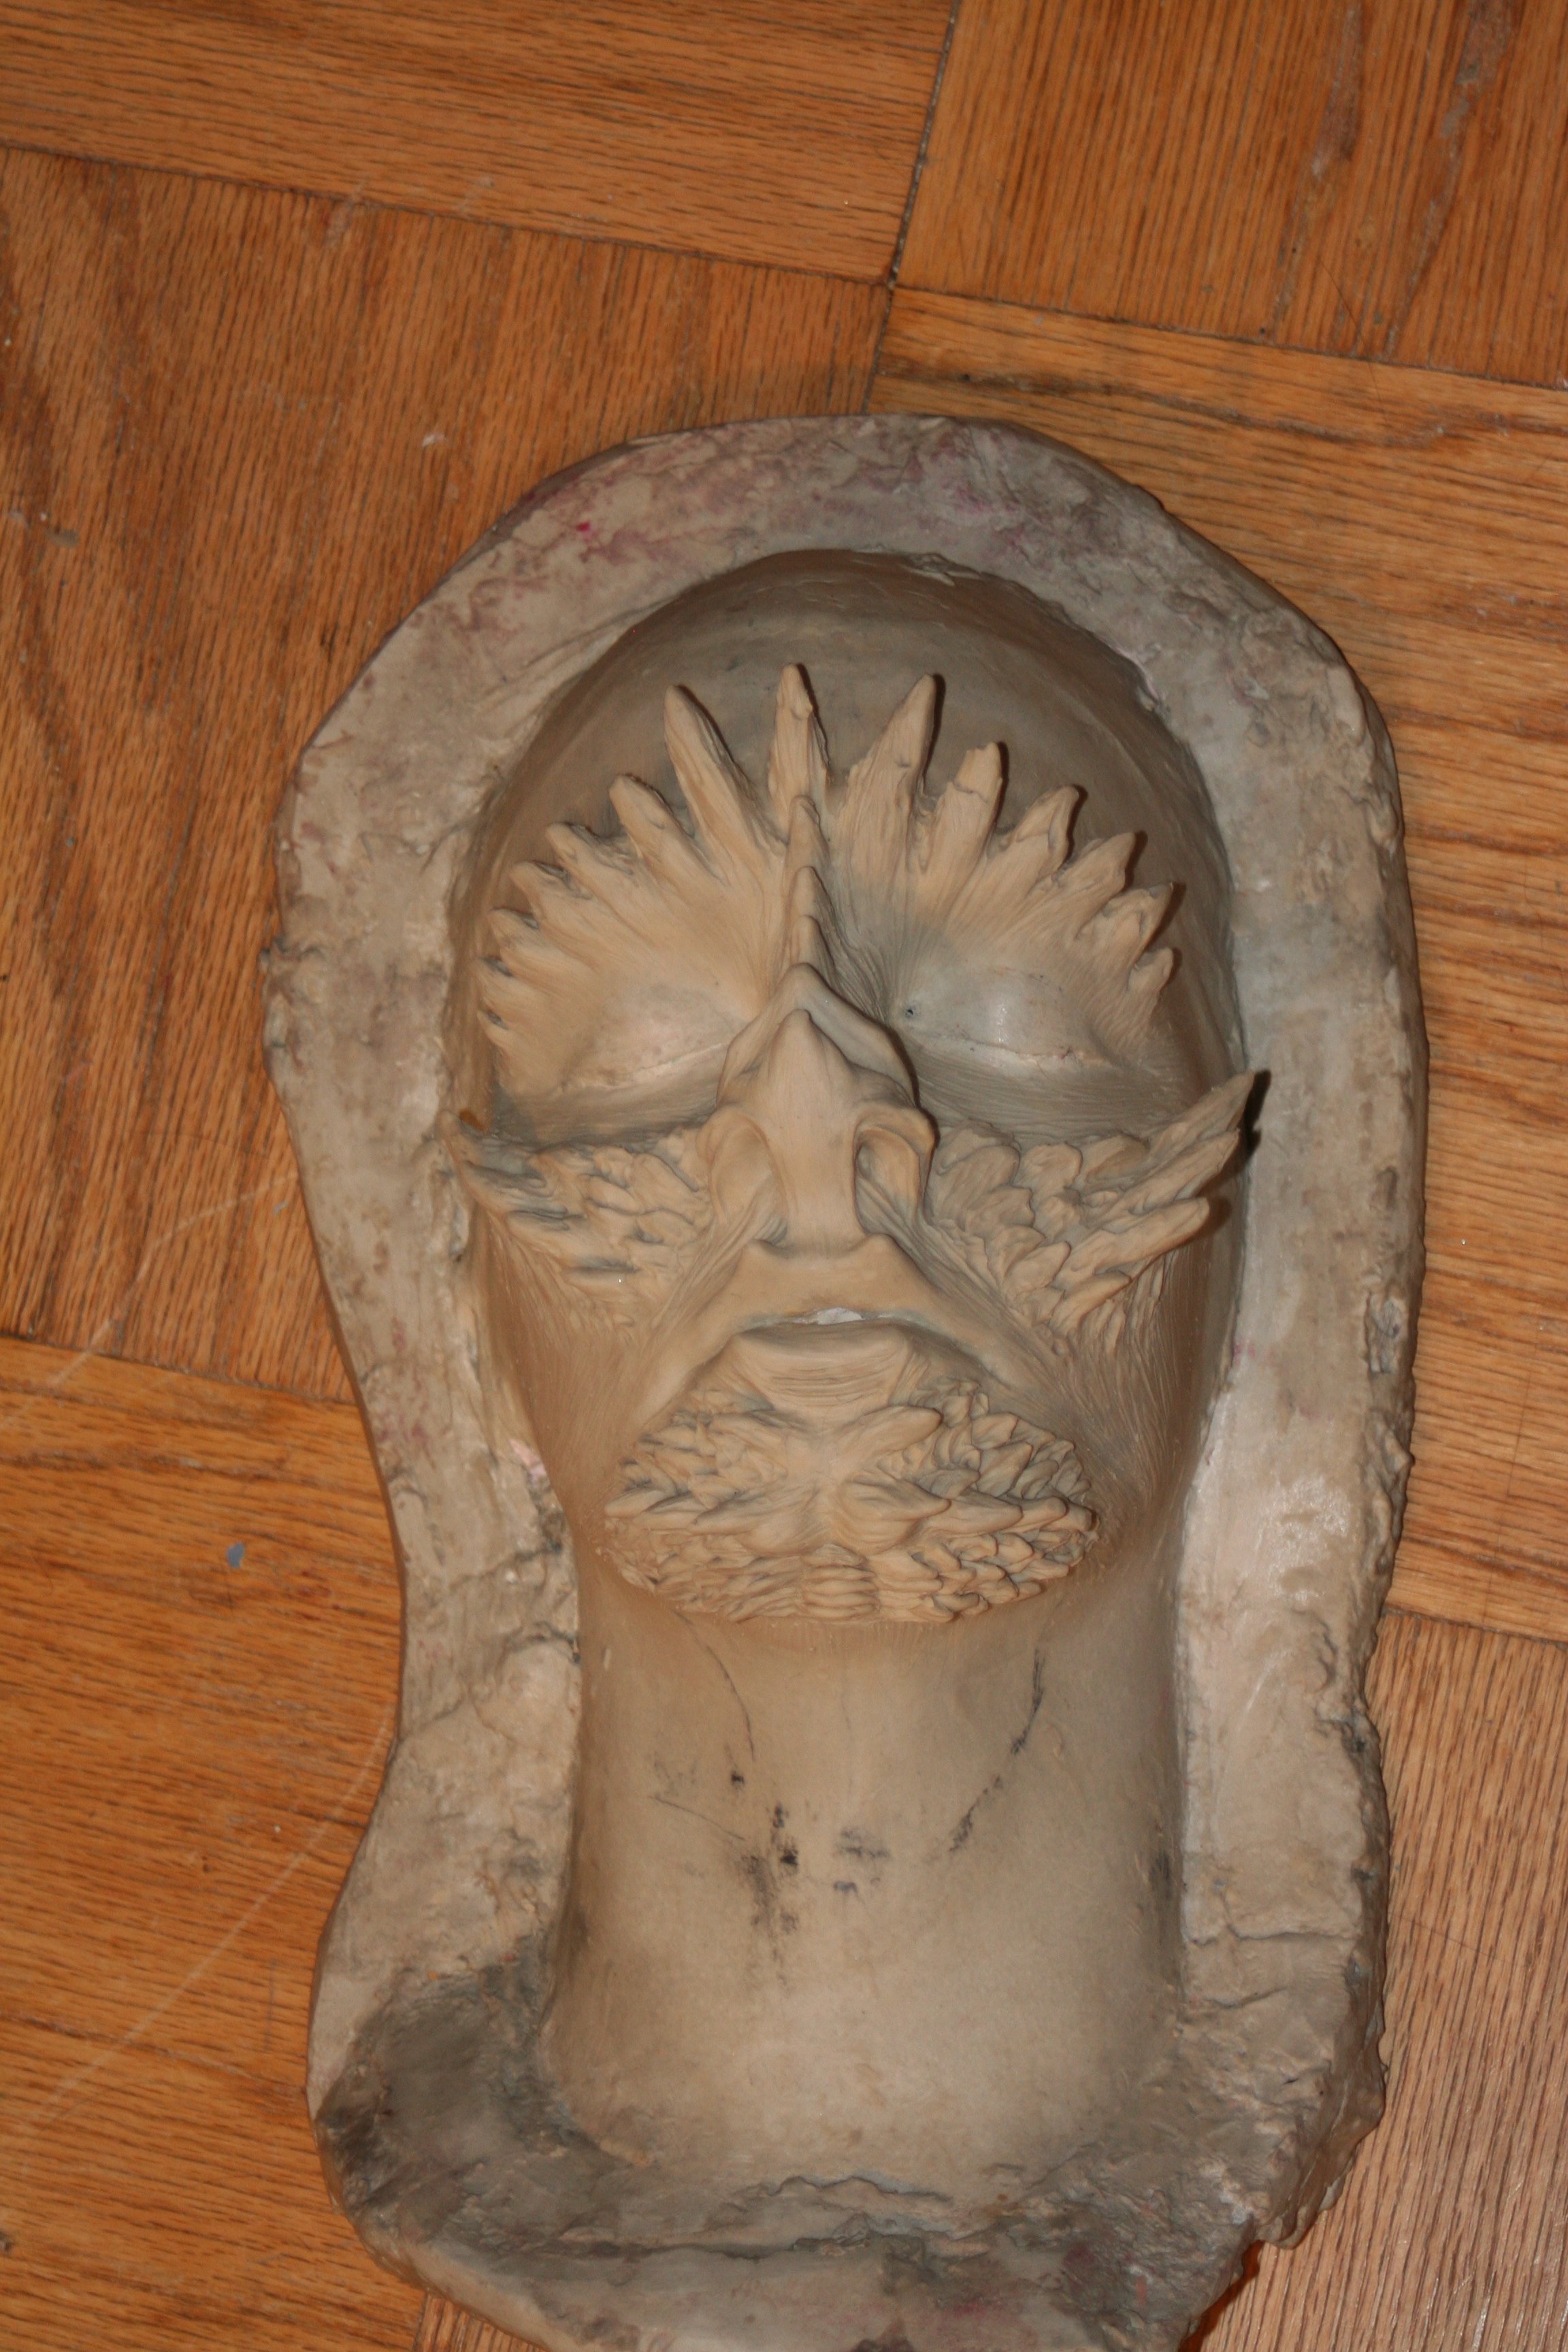
 Recently we had the opportunity to create a monster suit for our newest production, Lifeform. The actual application was the culmination of many months of work. First, we started out with some pre-production drawings like the one attached here.
You can see in the illustration that the creature’s head is actually pretty beastial and less humanoid than the final product–due to the fact that we had to fit it to the actresses’ actual face–oh well…!
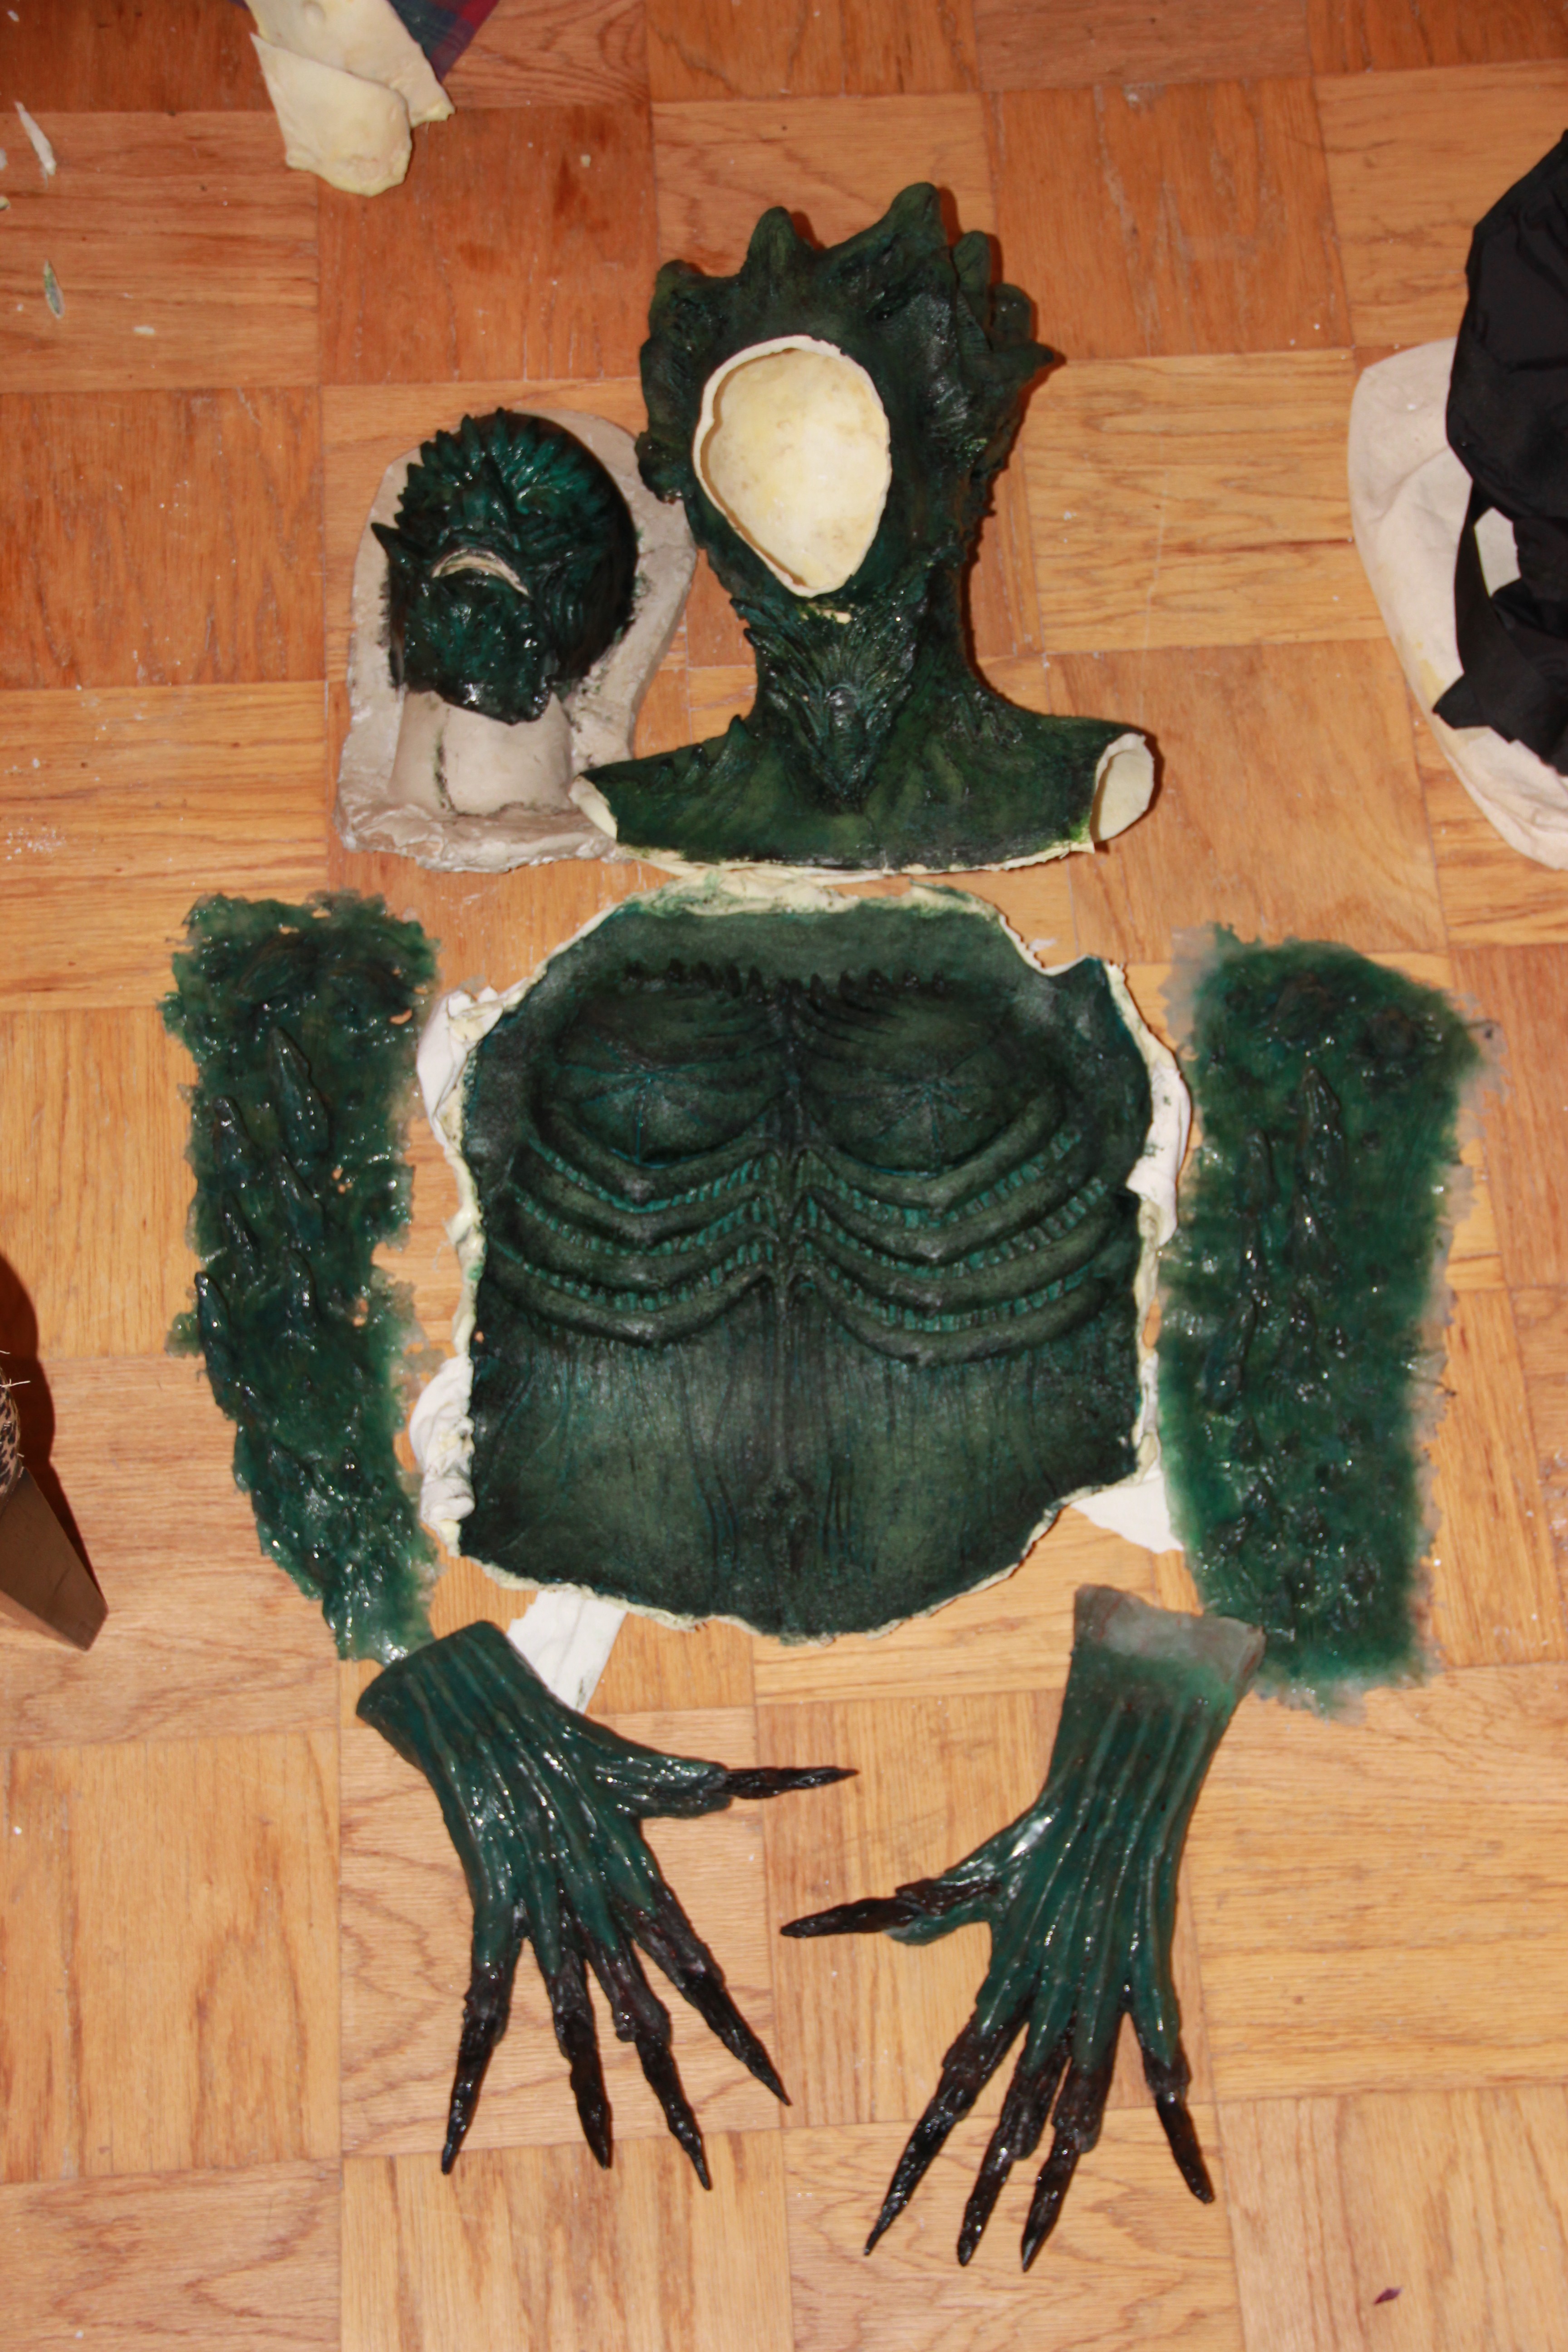
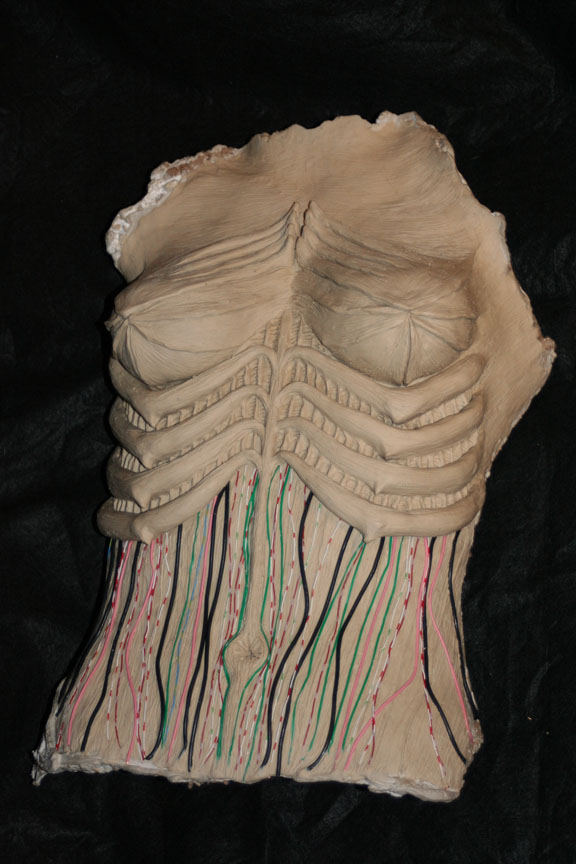
After deciding on a general look, we broke the design down in our brains–how were we going to end up building this thing and getting it on the actress? We decided to go with a multi-appliance approach–crafting numerous pieces out of silicone or latex and gluing them right on her. There were gloves with claws cast from resin, there were arm pieces that would attach to the top of her arms, there would be a chest piece, a head piece and finally, upper and lower face pieces.
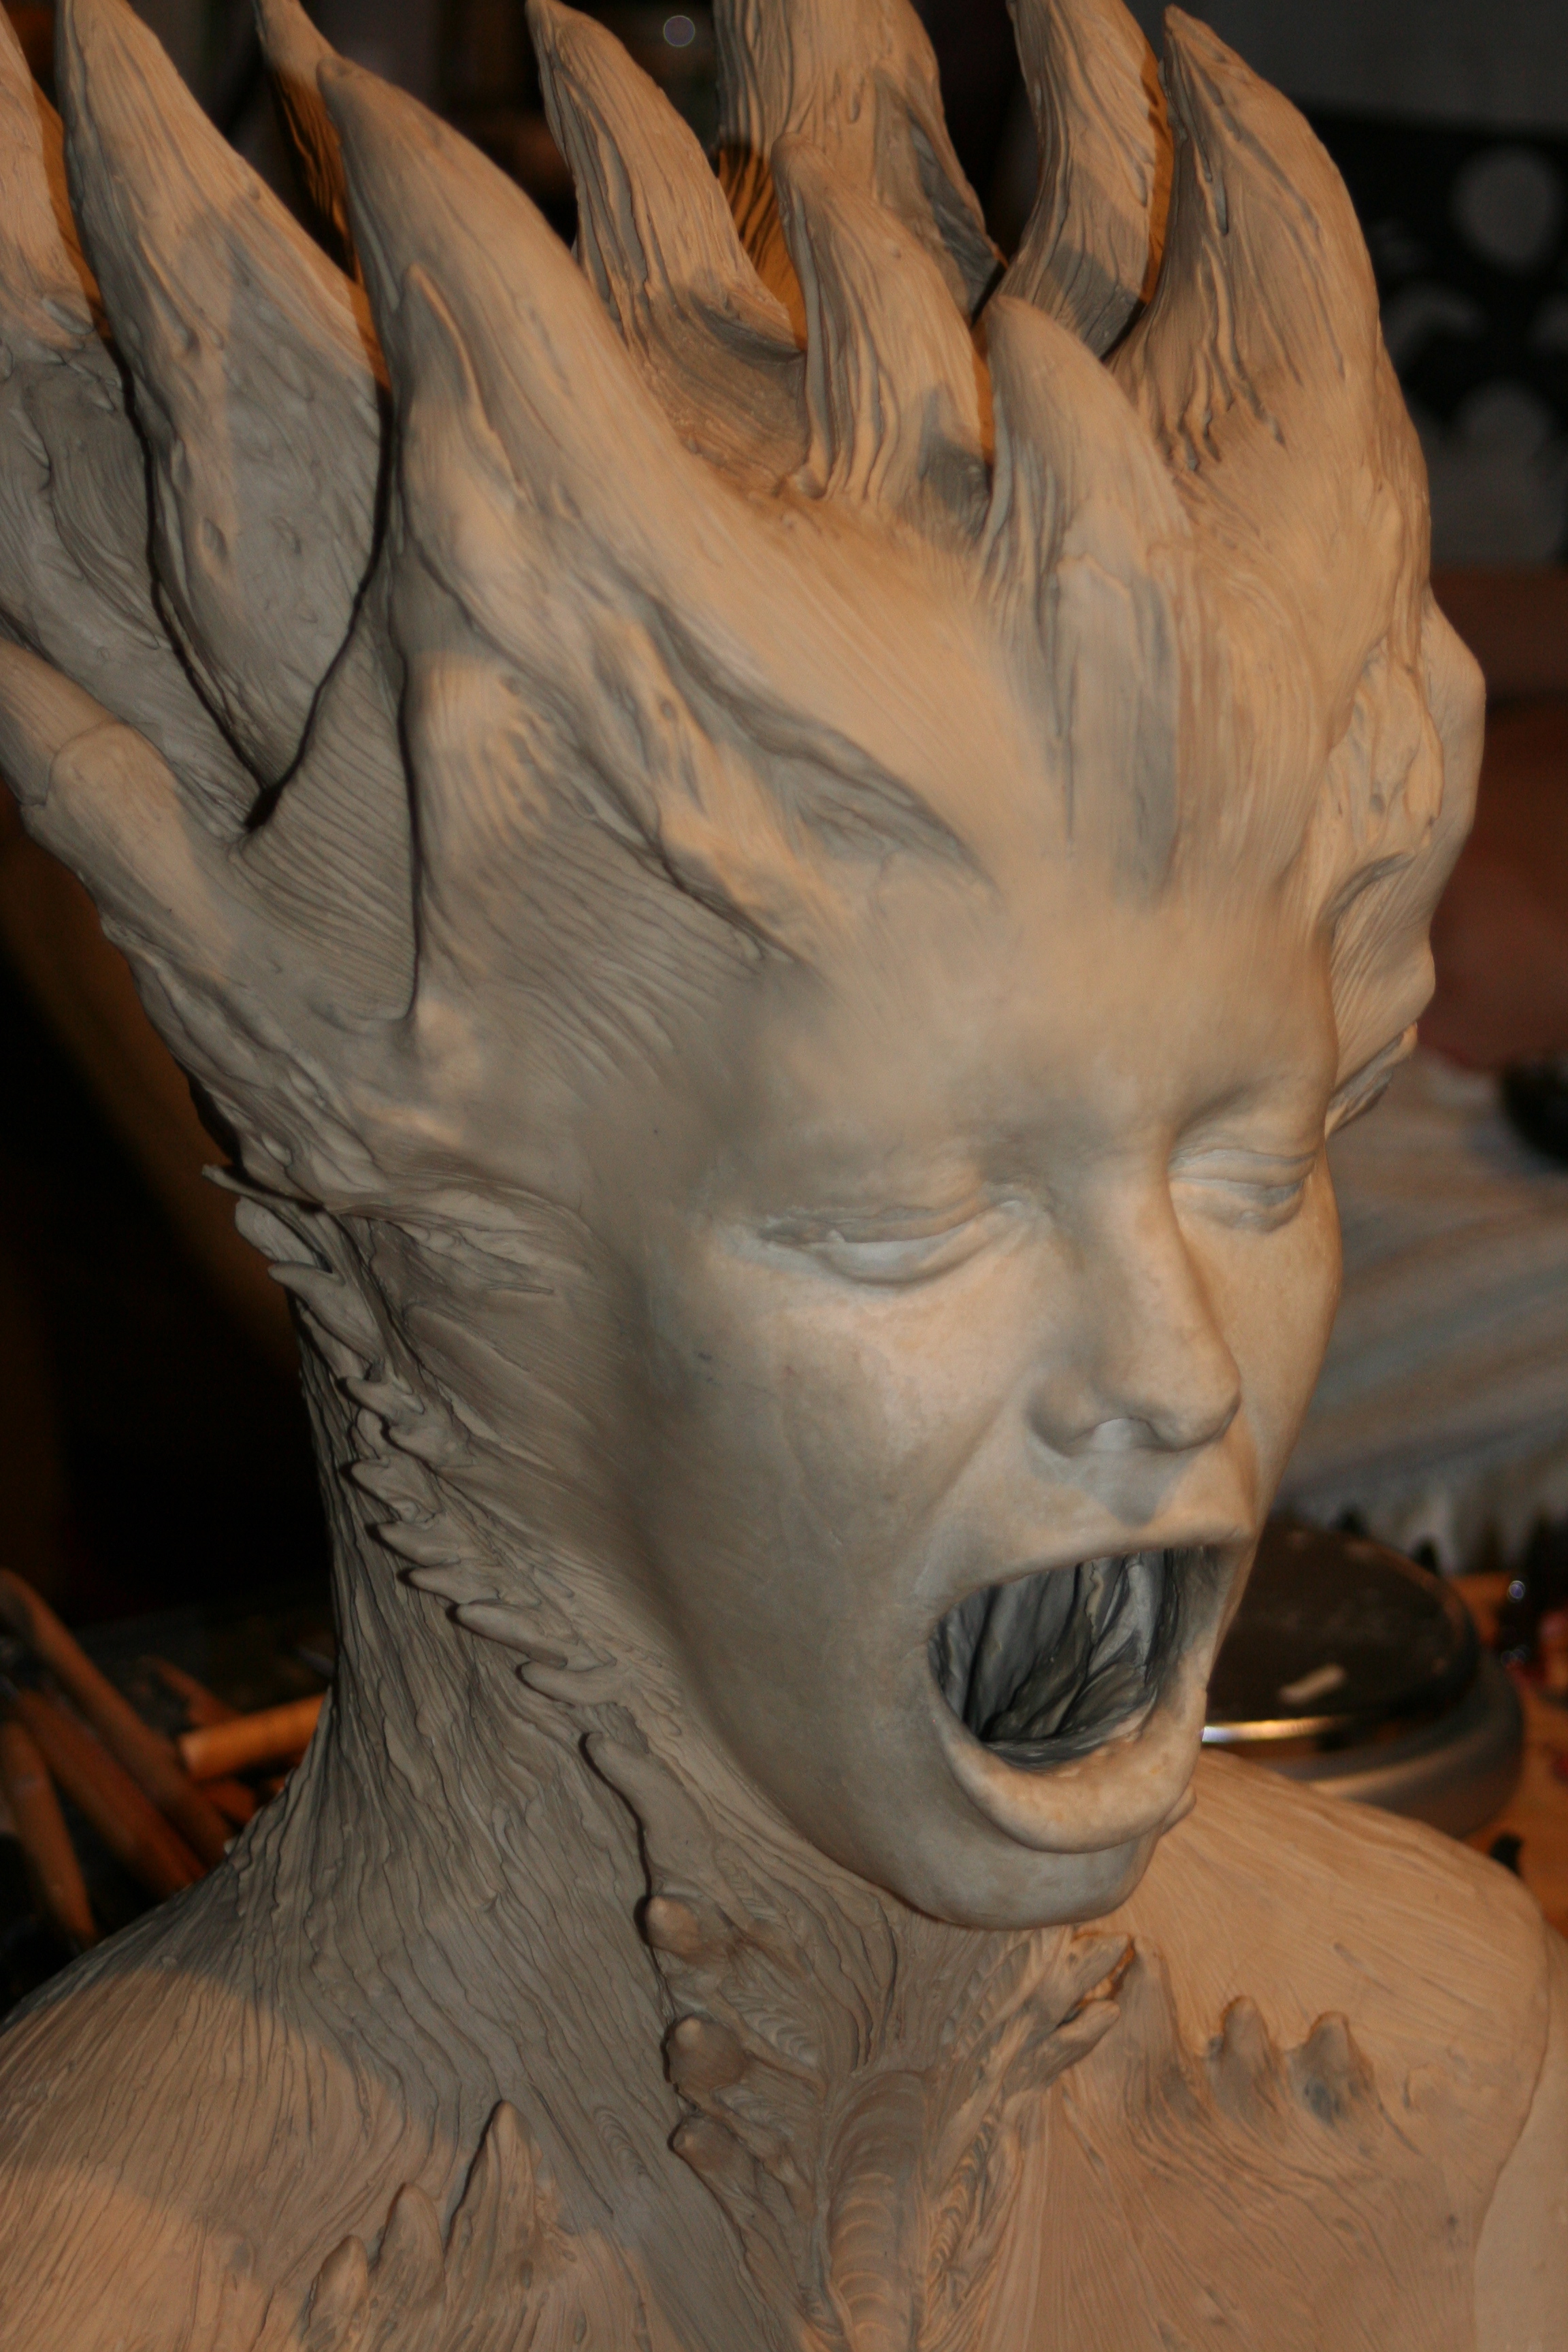
 First, I sculpted each and every piece from plasticene, using body casts we had taken of an actress, as the base on which to sculpt them. This took a little while, since there were numerous pieces that were going to be required, but it turned out to be worth it when we saw the final product.
After the pieces were sculpted, we cast them, sometimes in Rebound, in the case of pieces we were going to create in silicone, such as the arms, hands and face, or in plaster, for pieces we were going to create in latex, as a cost-cutting measure. These were the chest and head pieces, which were huge.
 We had Anthony Jones, a very experienced mold maker, cast them in Ultracal plaster.(I still don’t know where I’m gonna put these monster molds. They’re doubling as a coffee table and a futon in my tiny apartment!)
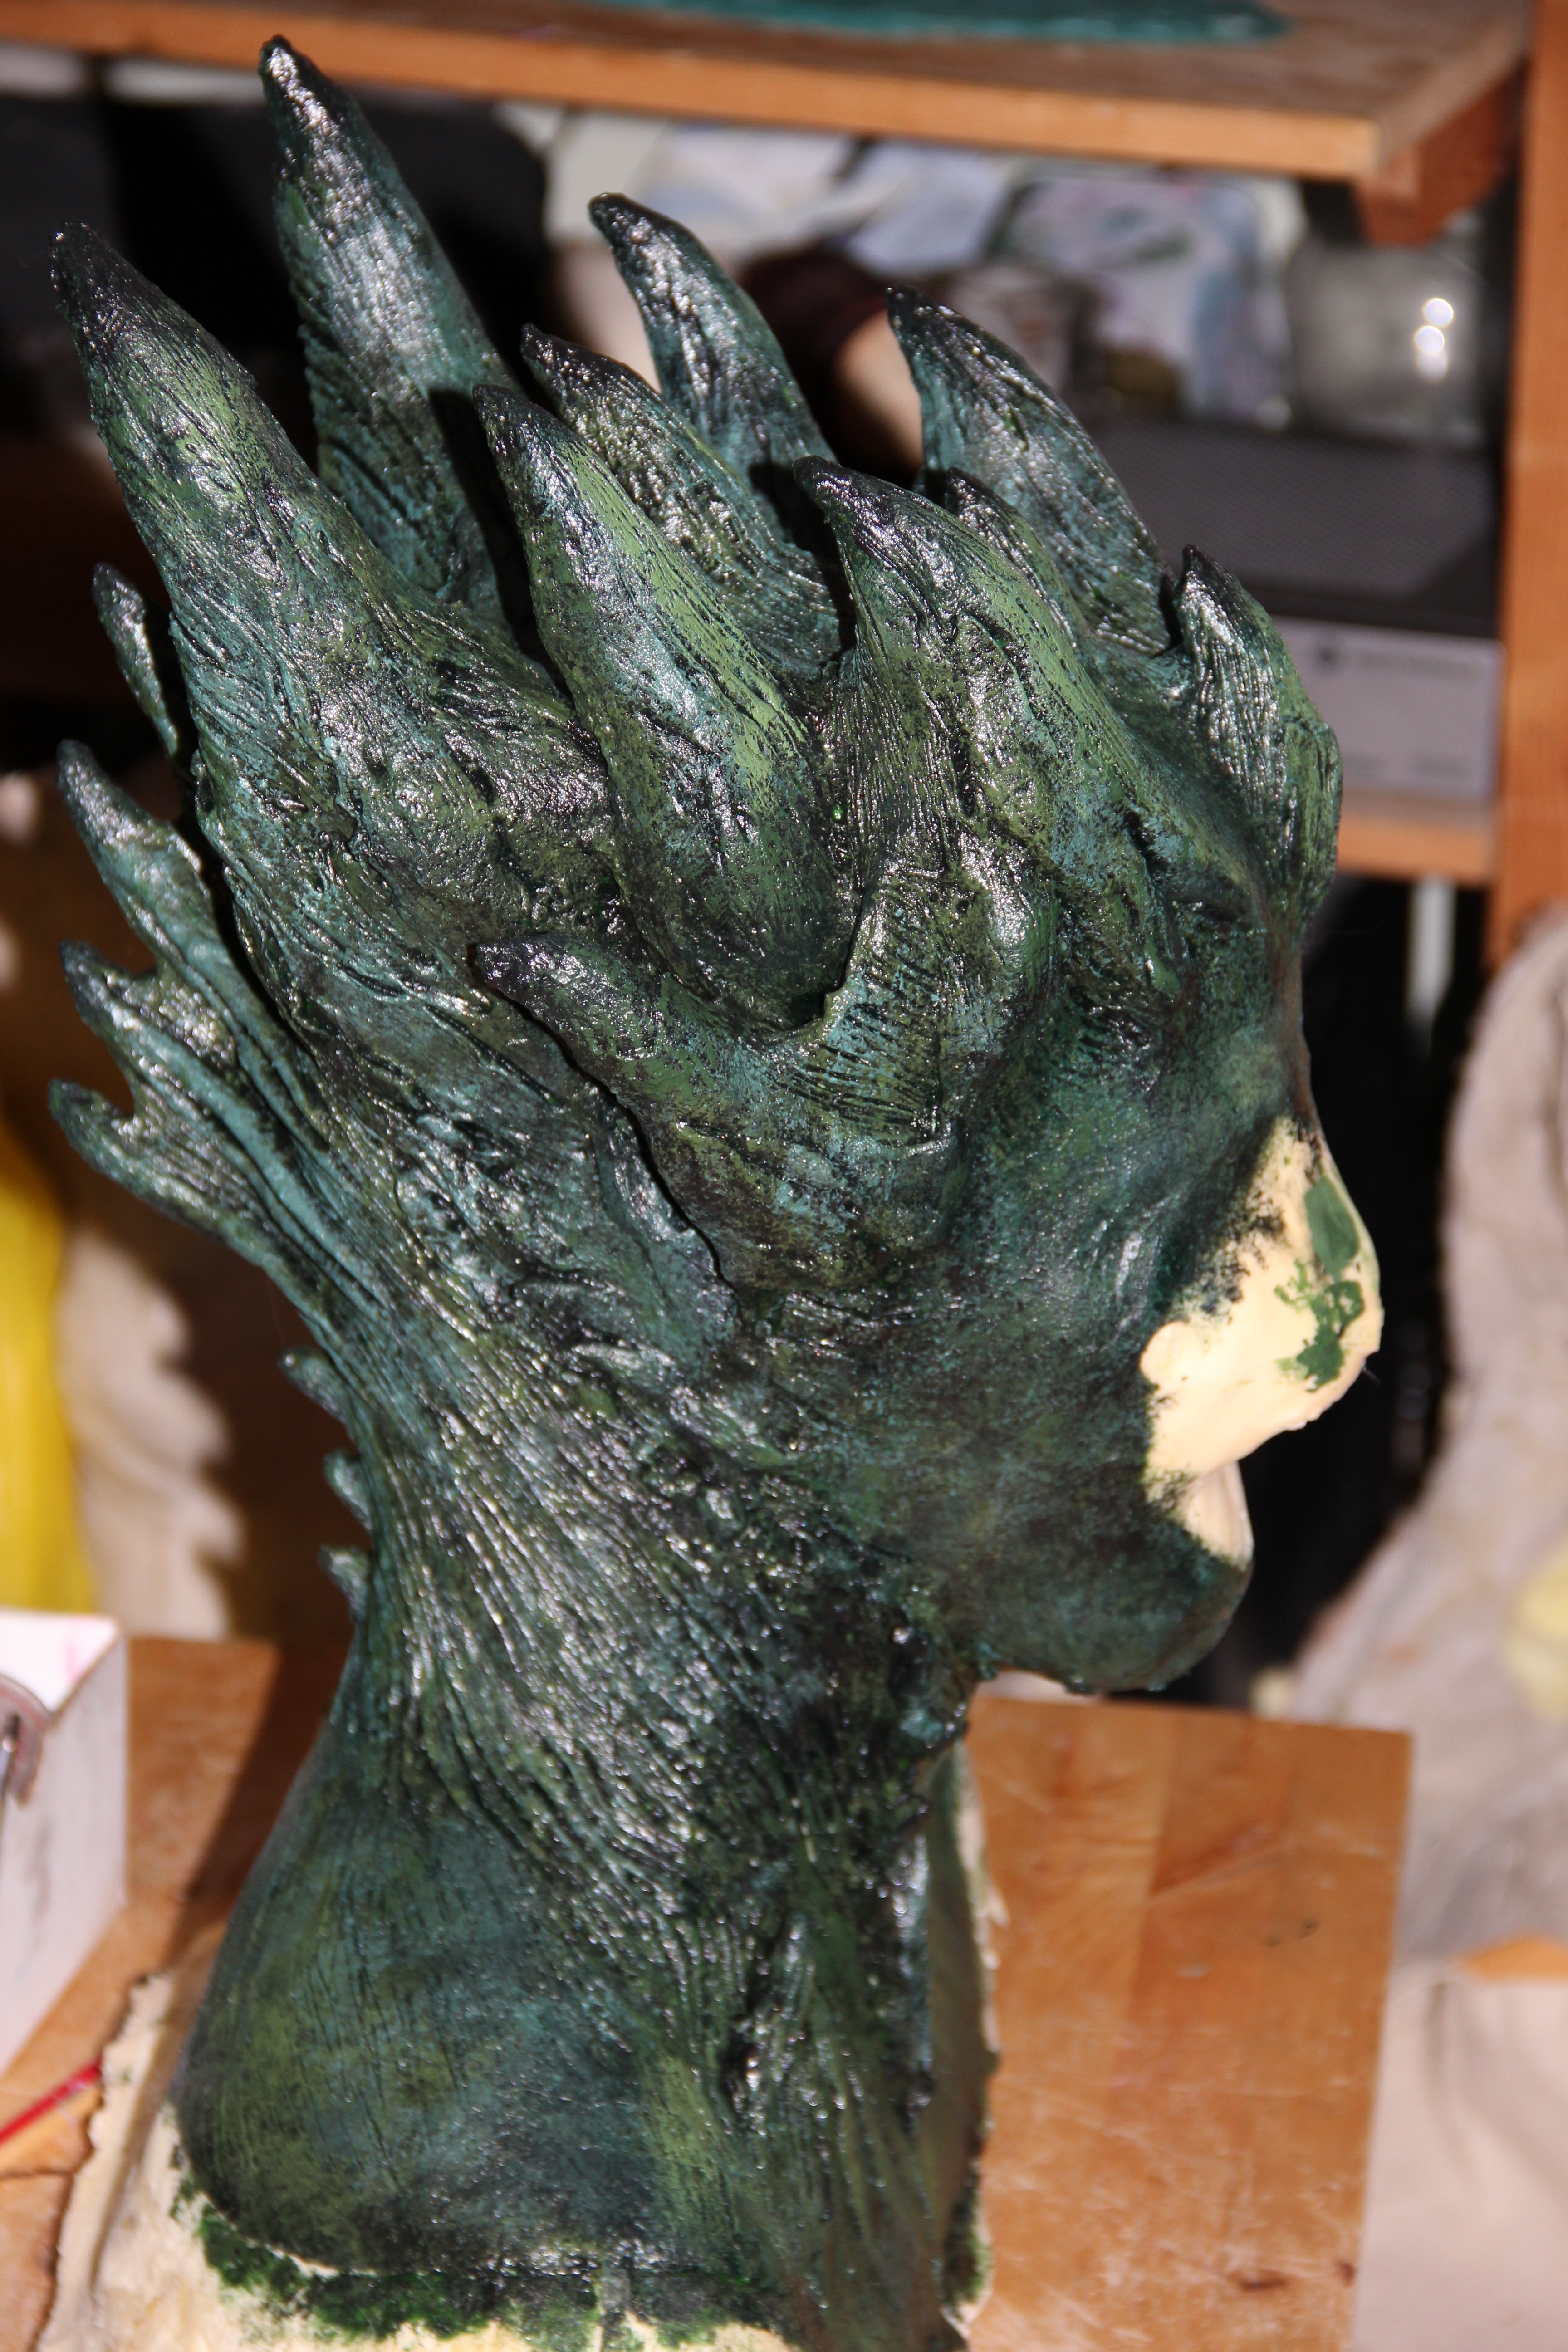
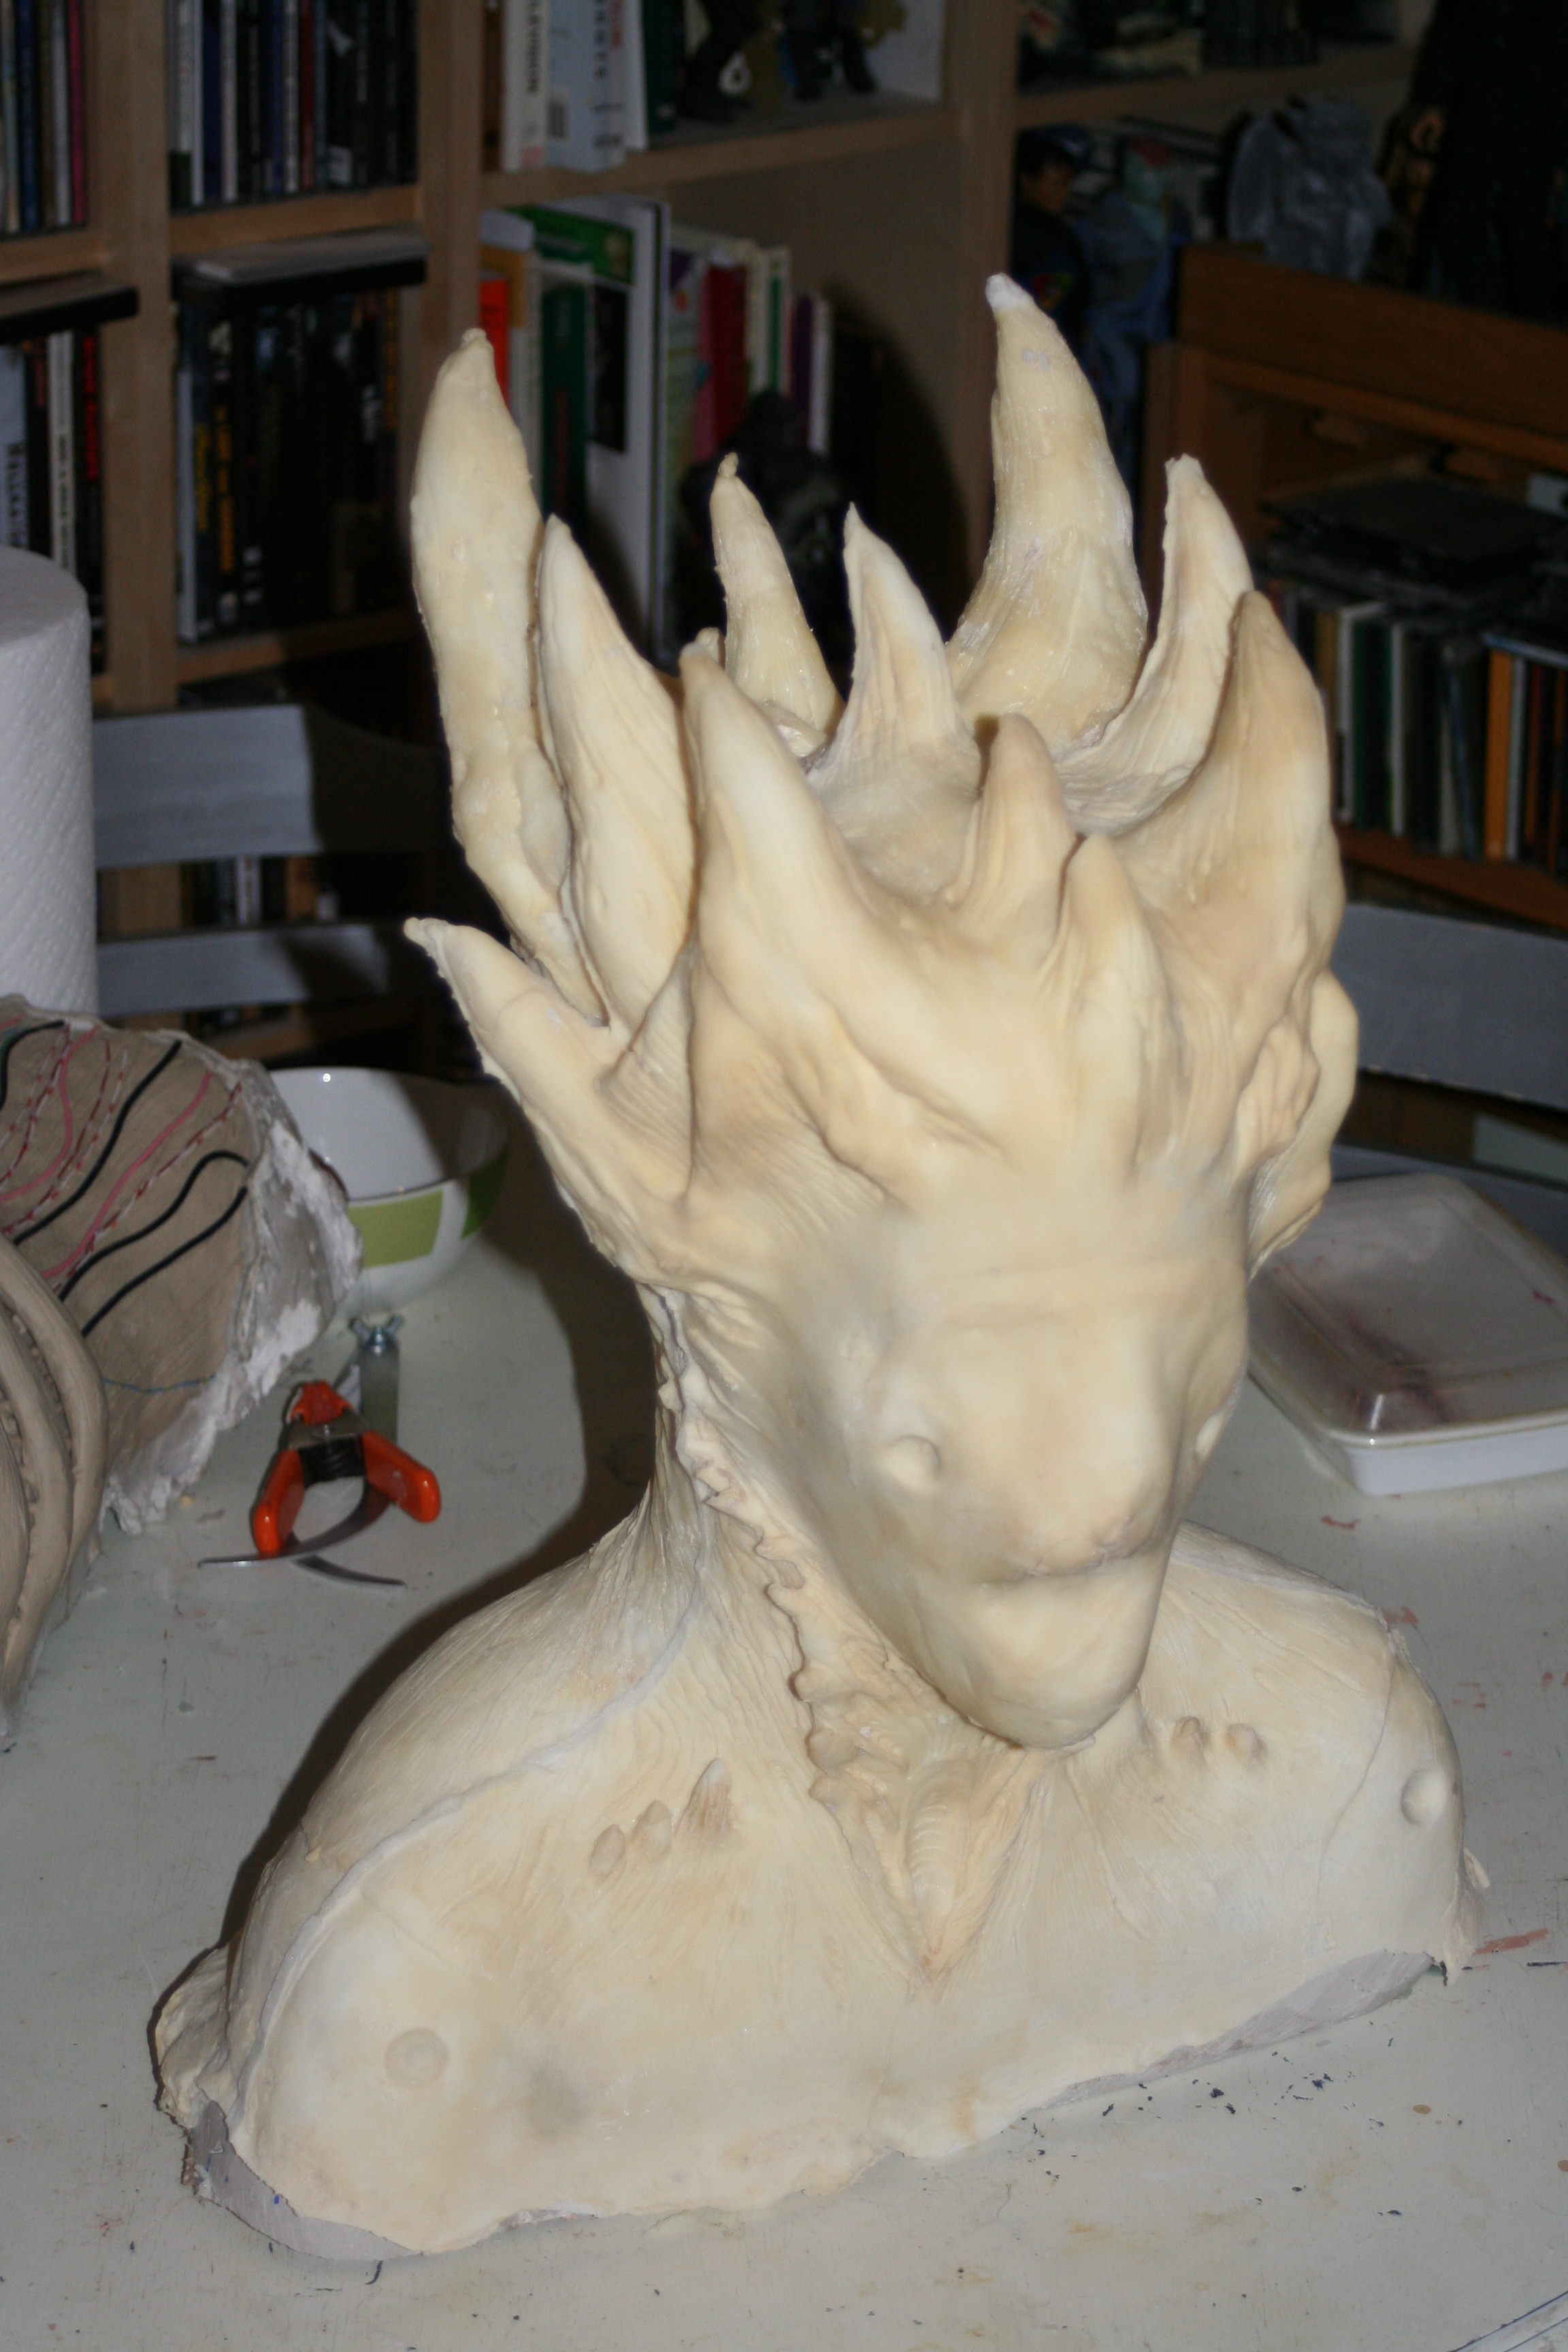
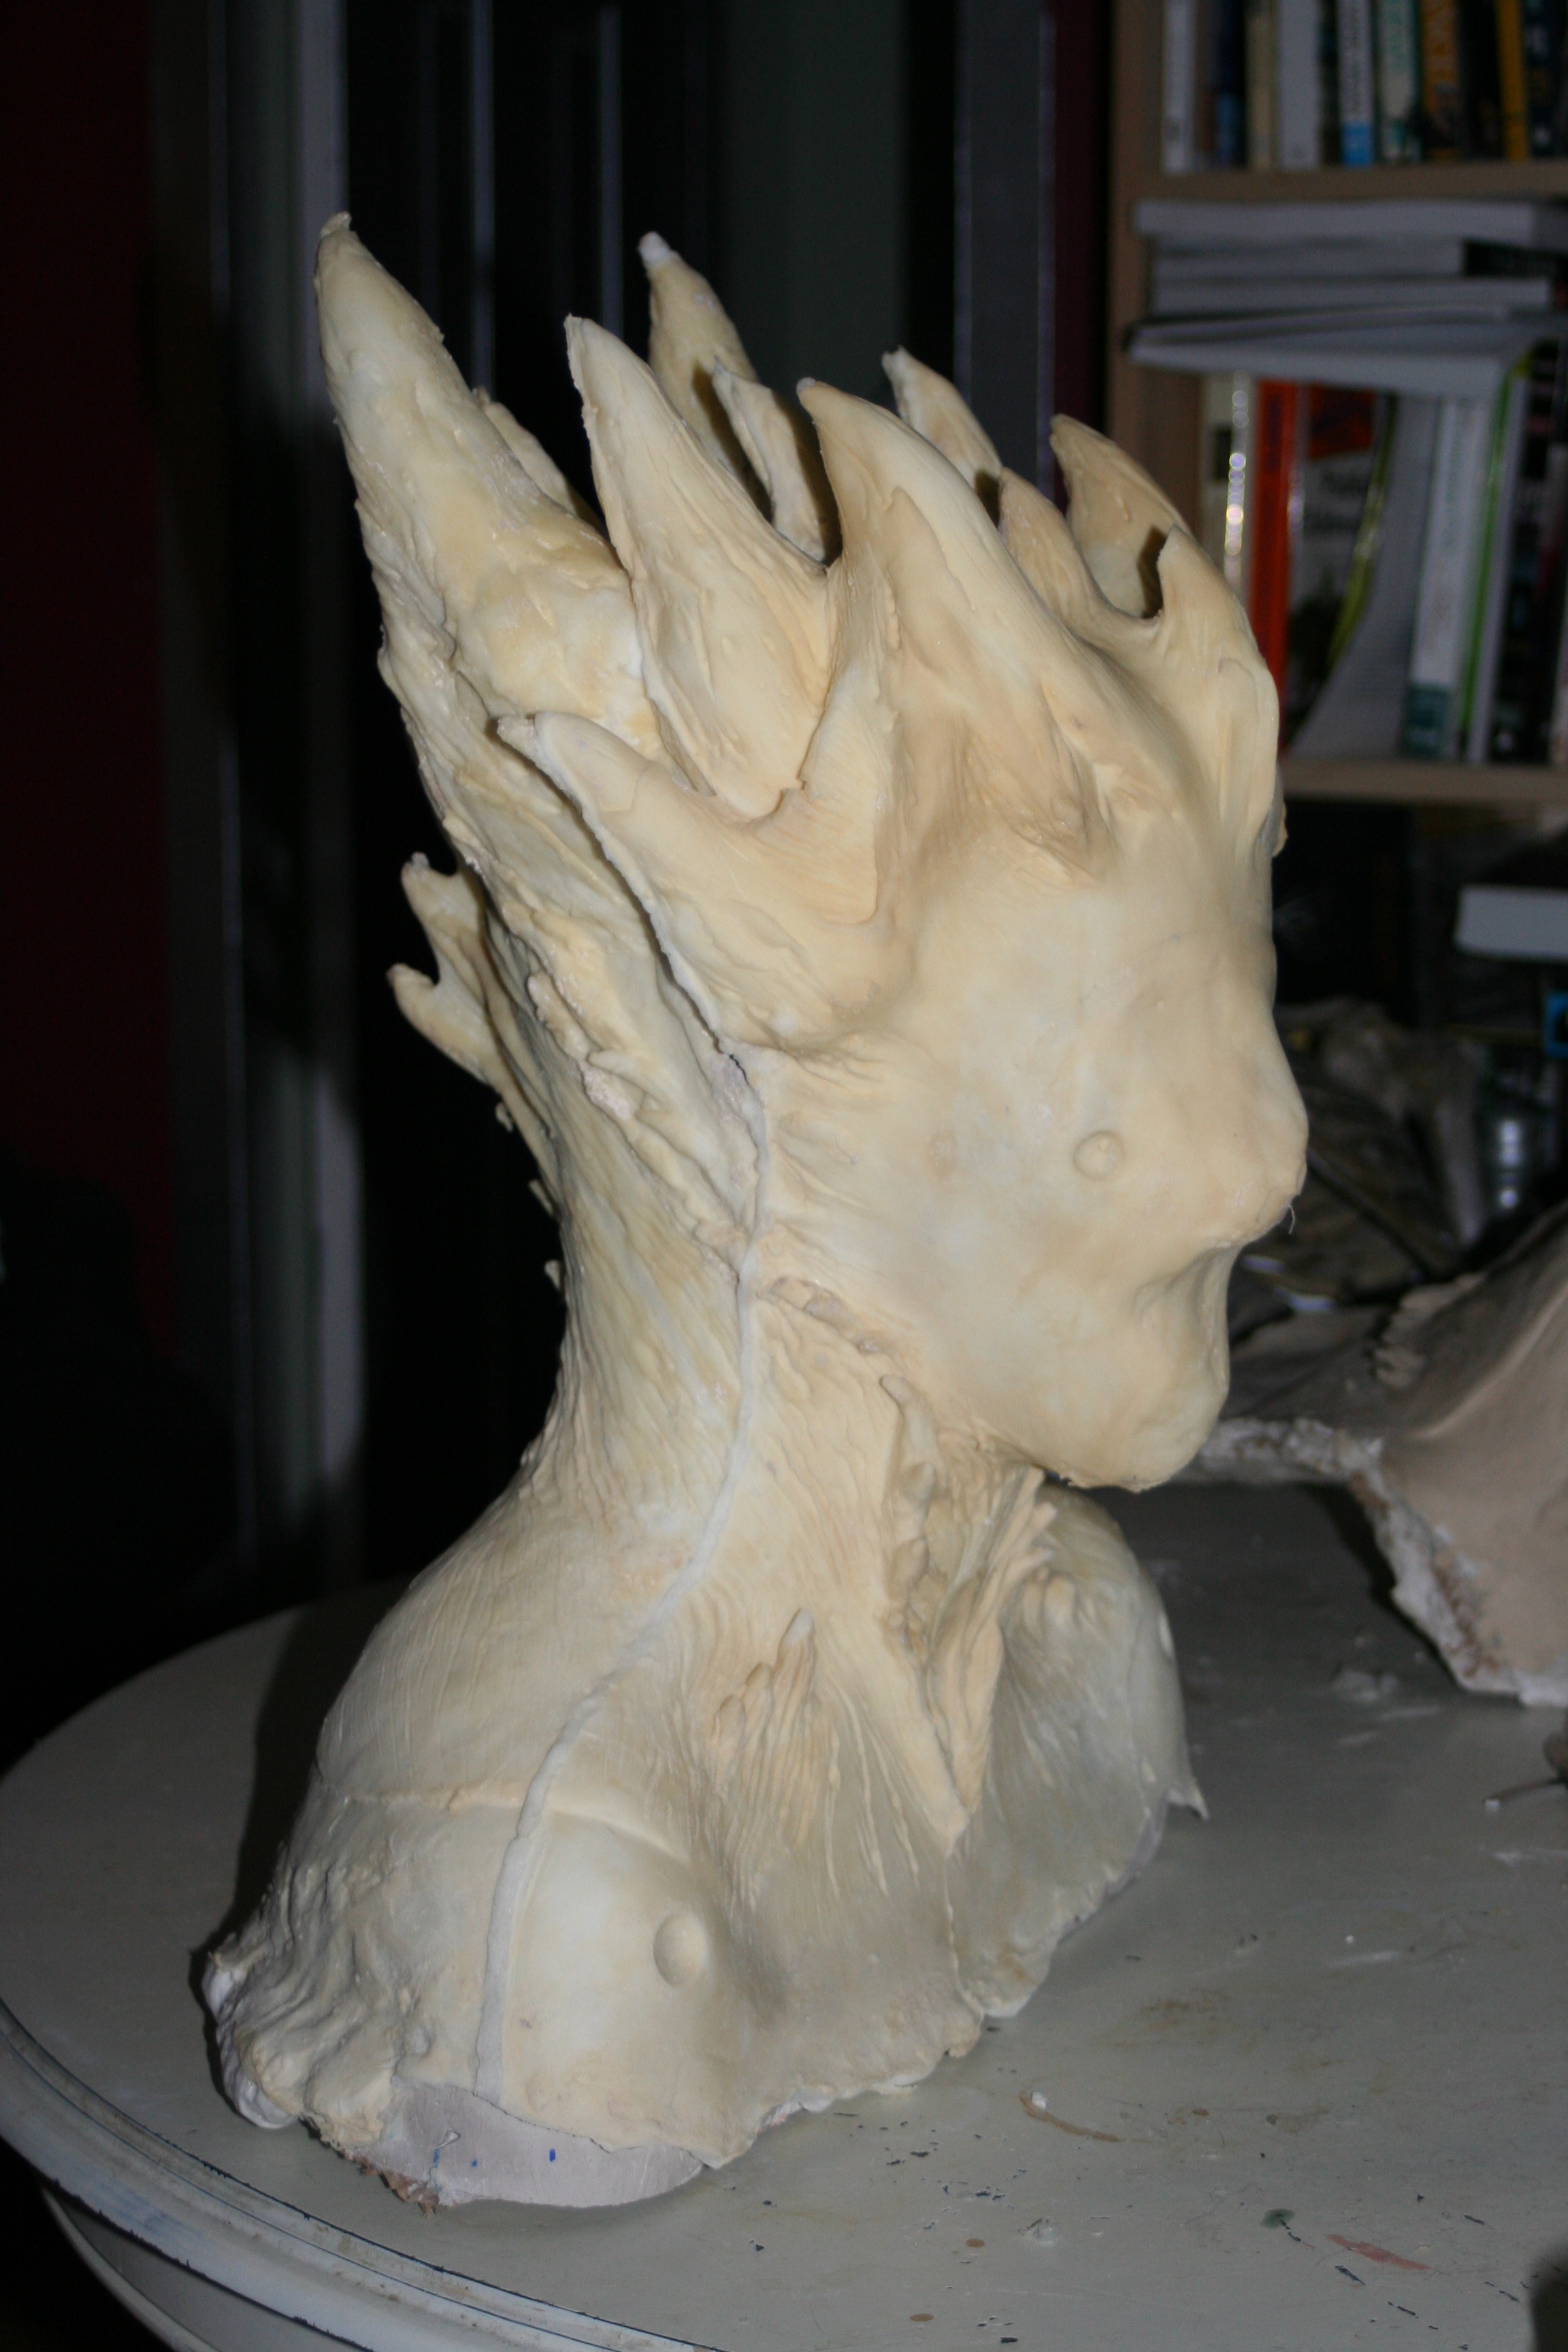
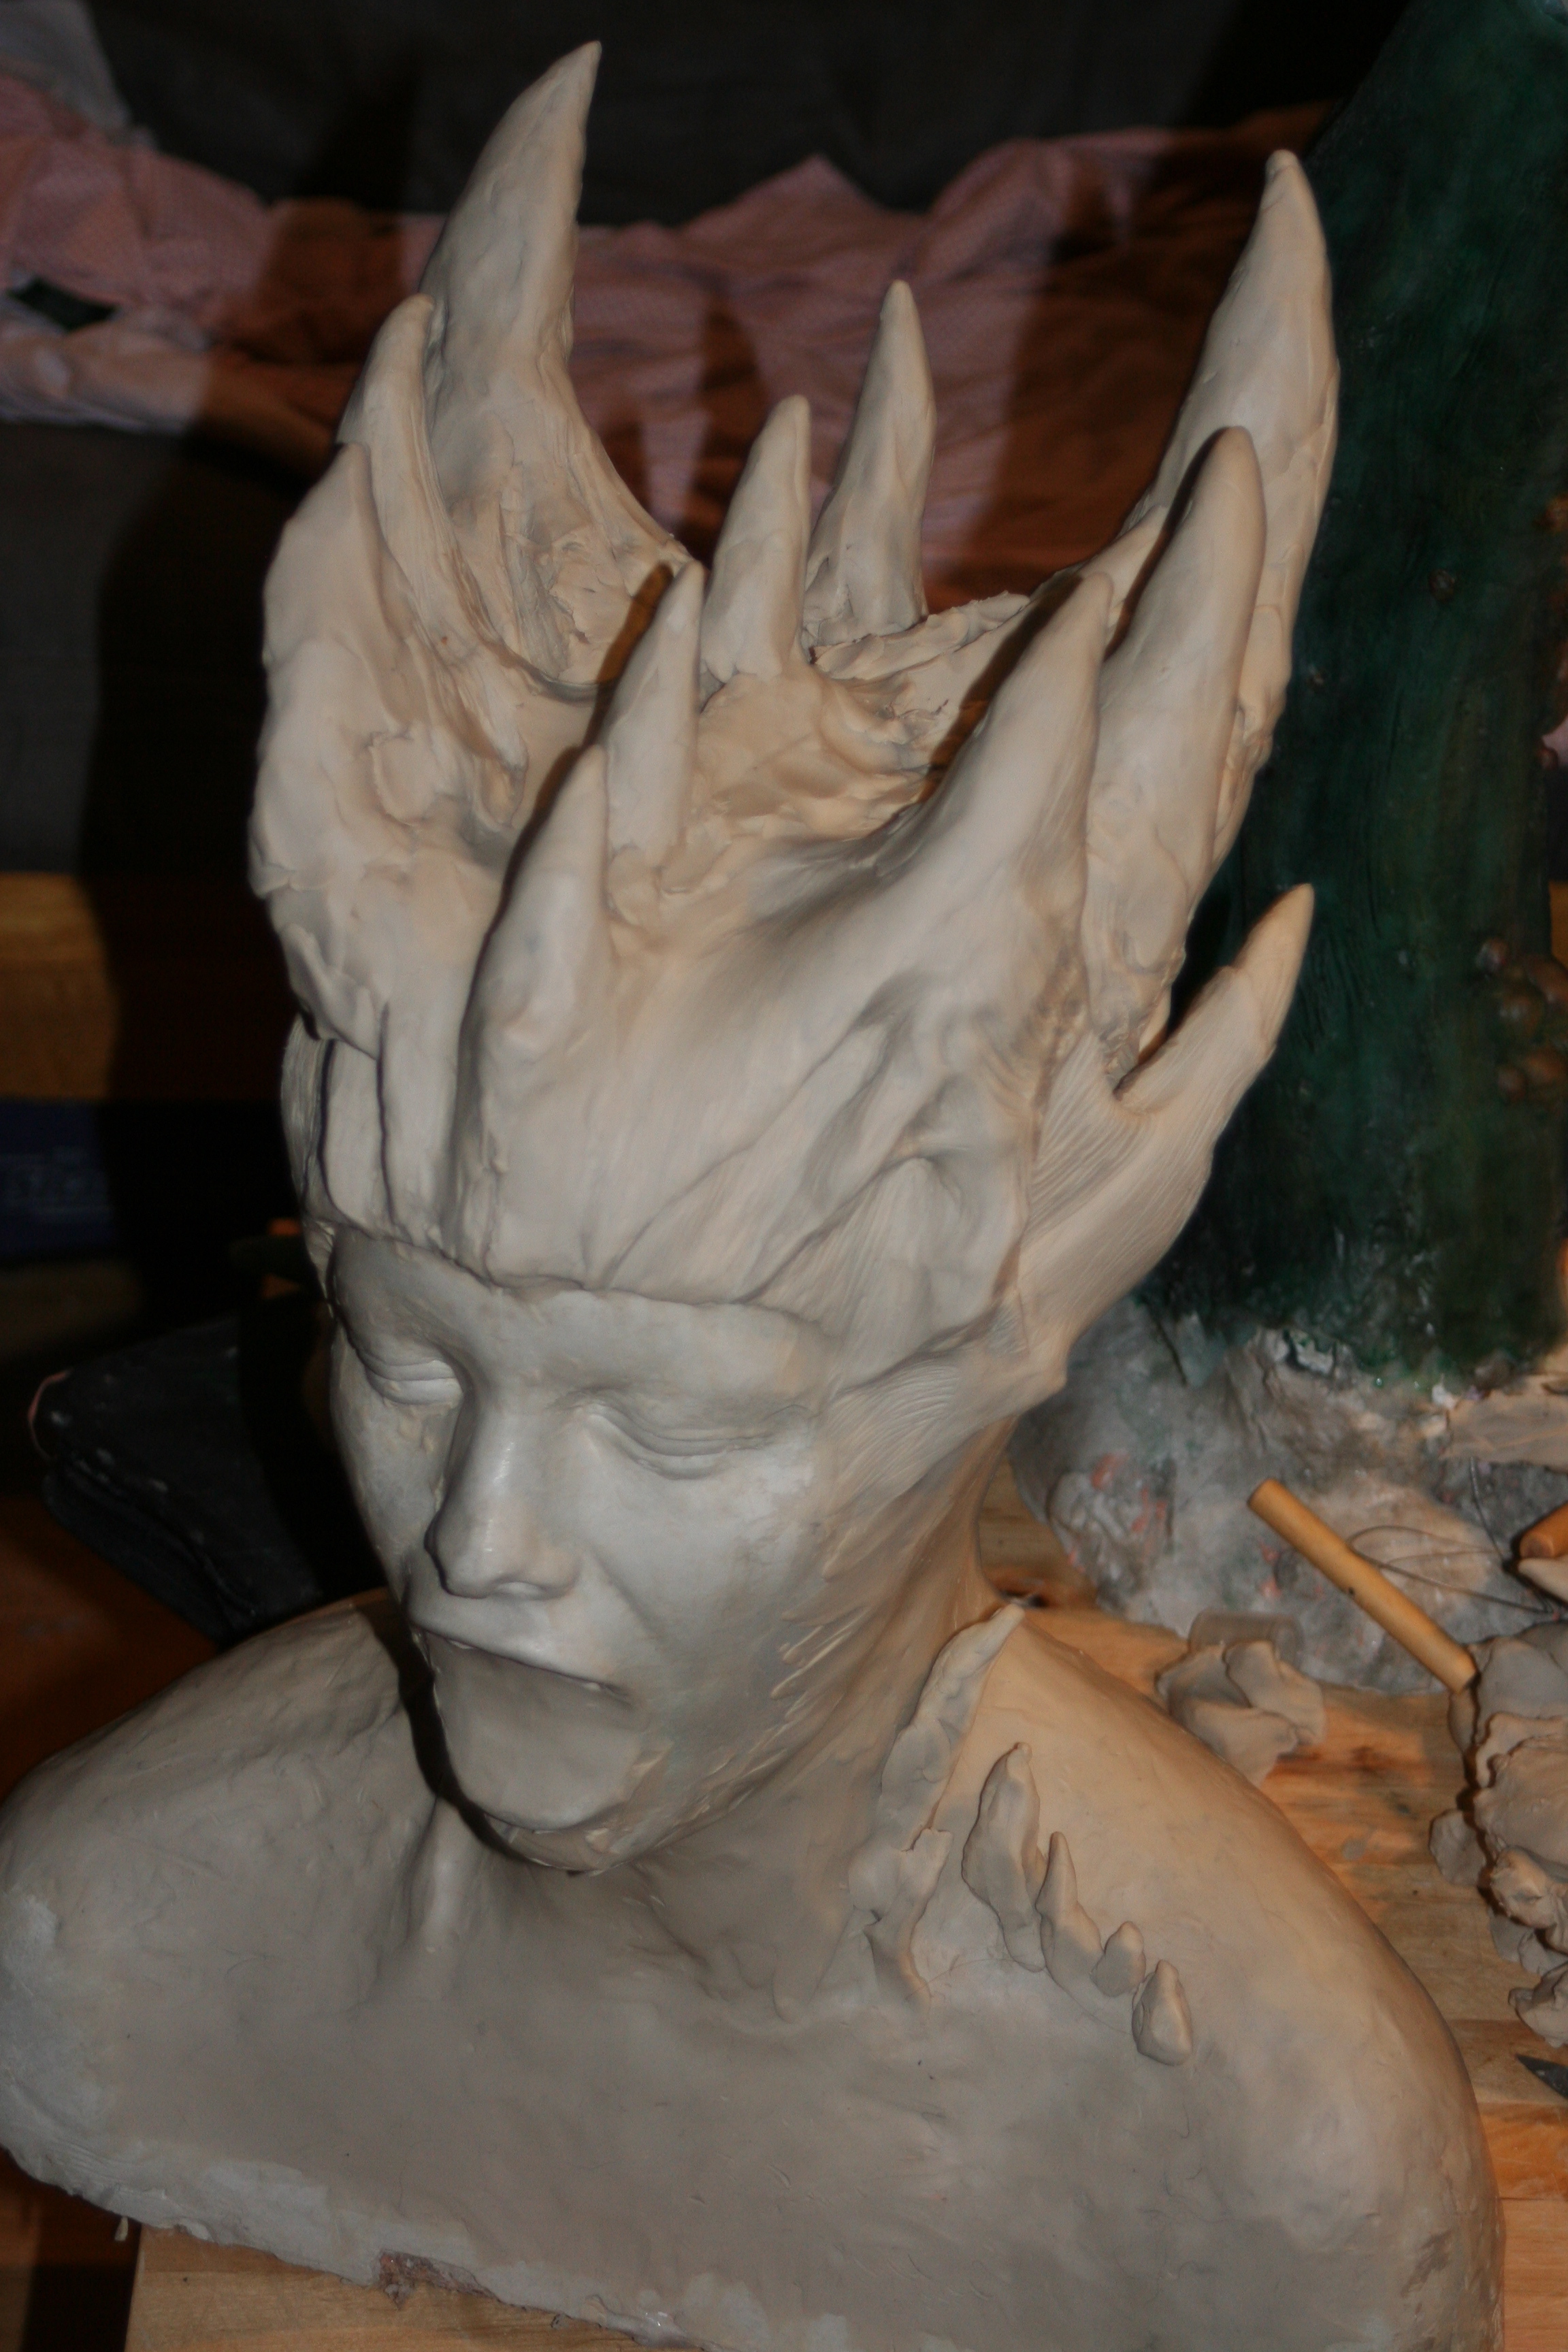
Then he slip molded the pieces, creating a top layer of latex by pouring mask making latex #80 in the molds, gradually building up several layers. Once that was done, he created an inner layer of foam to give the pieces shape and definition. He did a great job as you can see below.
After that, Christine painted them, doing a boffo job as usual! She used PAX paint on the latex pieces and FuseFX and Psycho paint, Sil-Pig brand pigments on the silicone pieces. She really brought them to life by painted on a dark base and lighter-colored highlights, as you can see in these pictures.
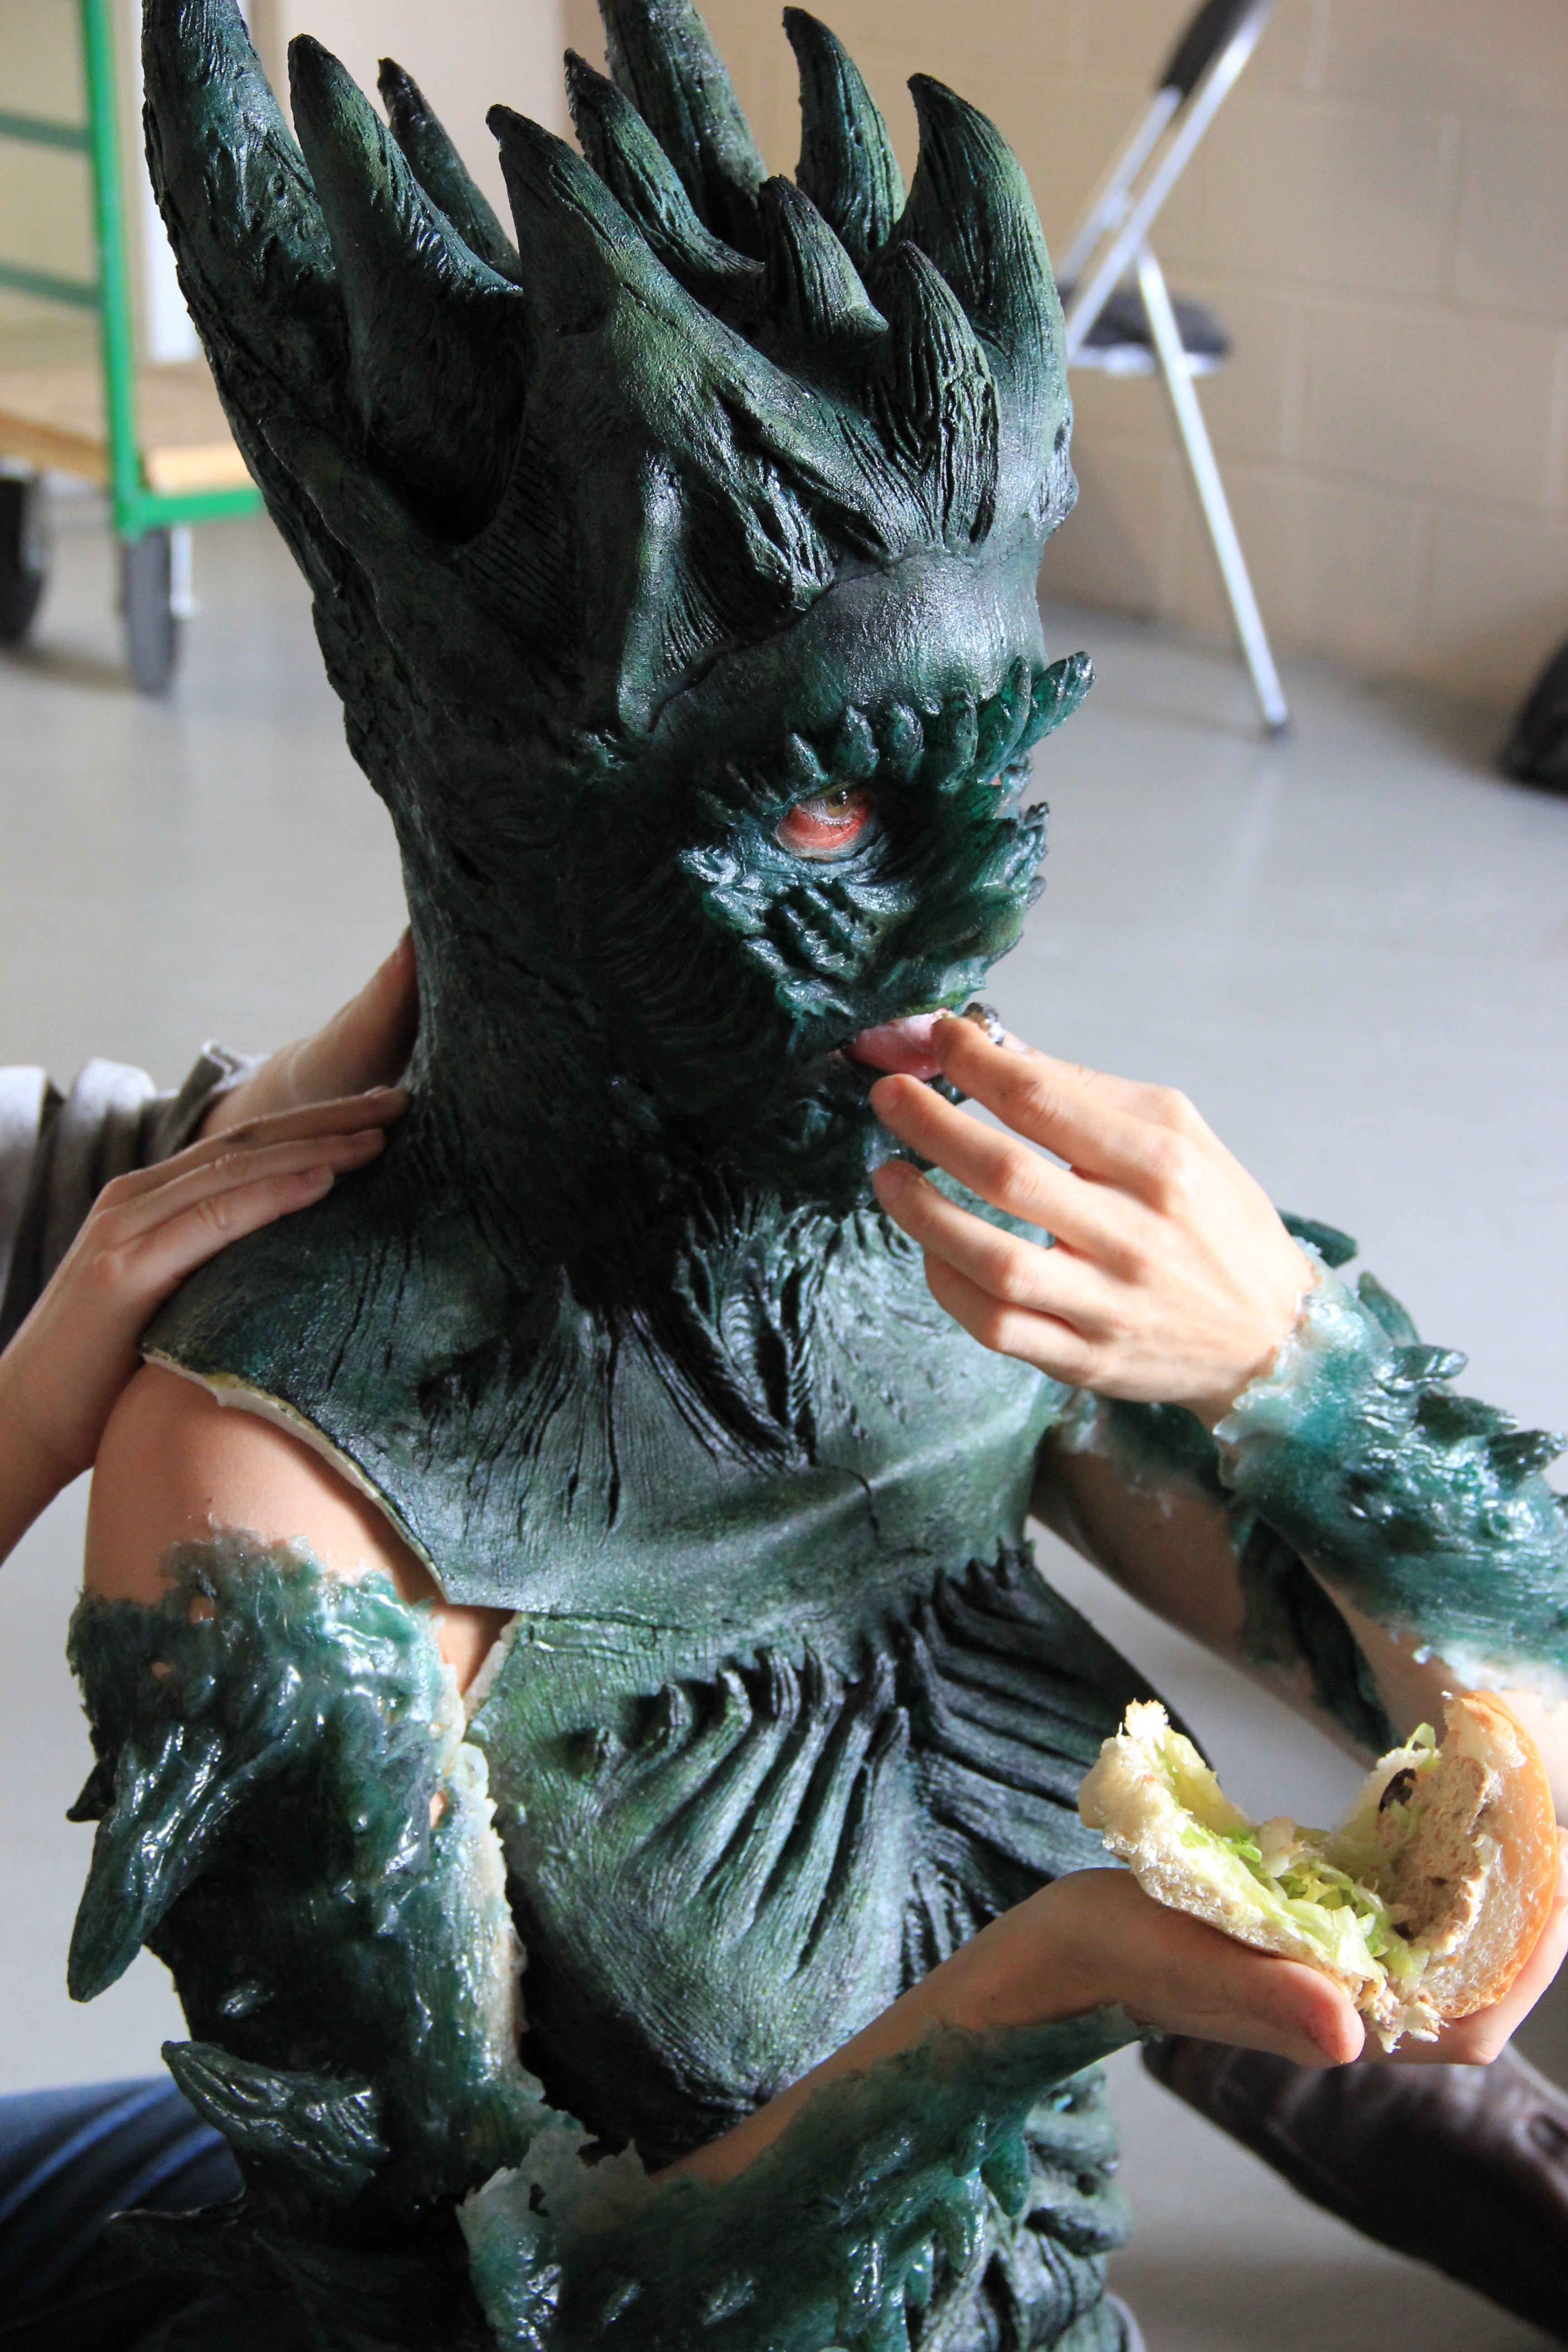
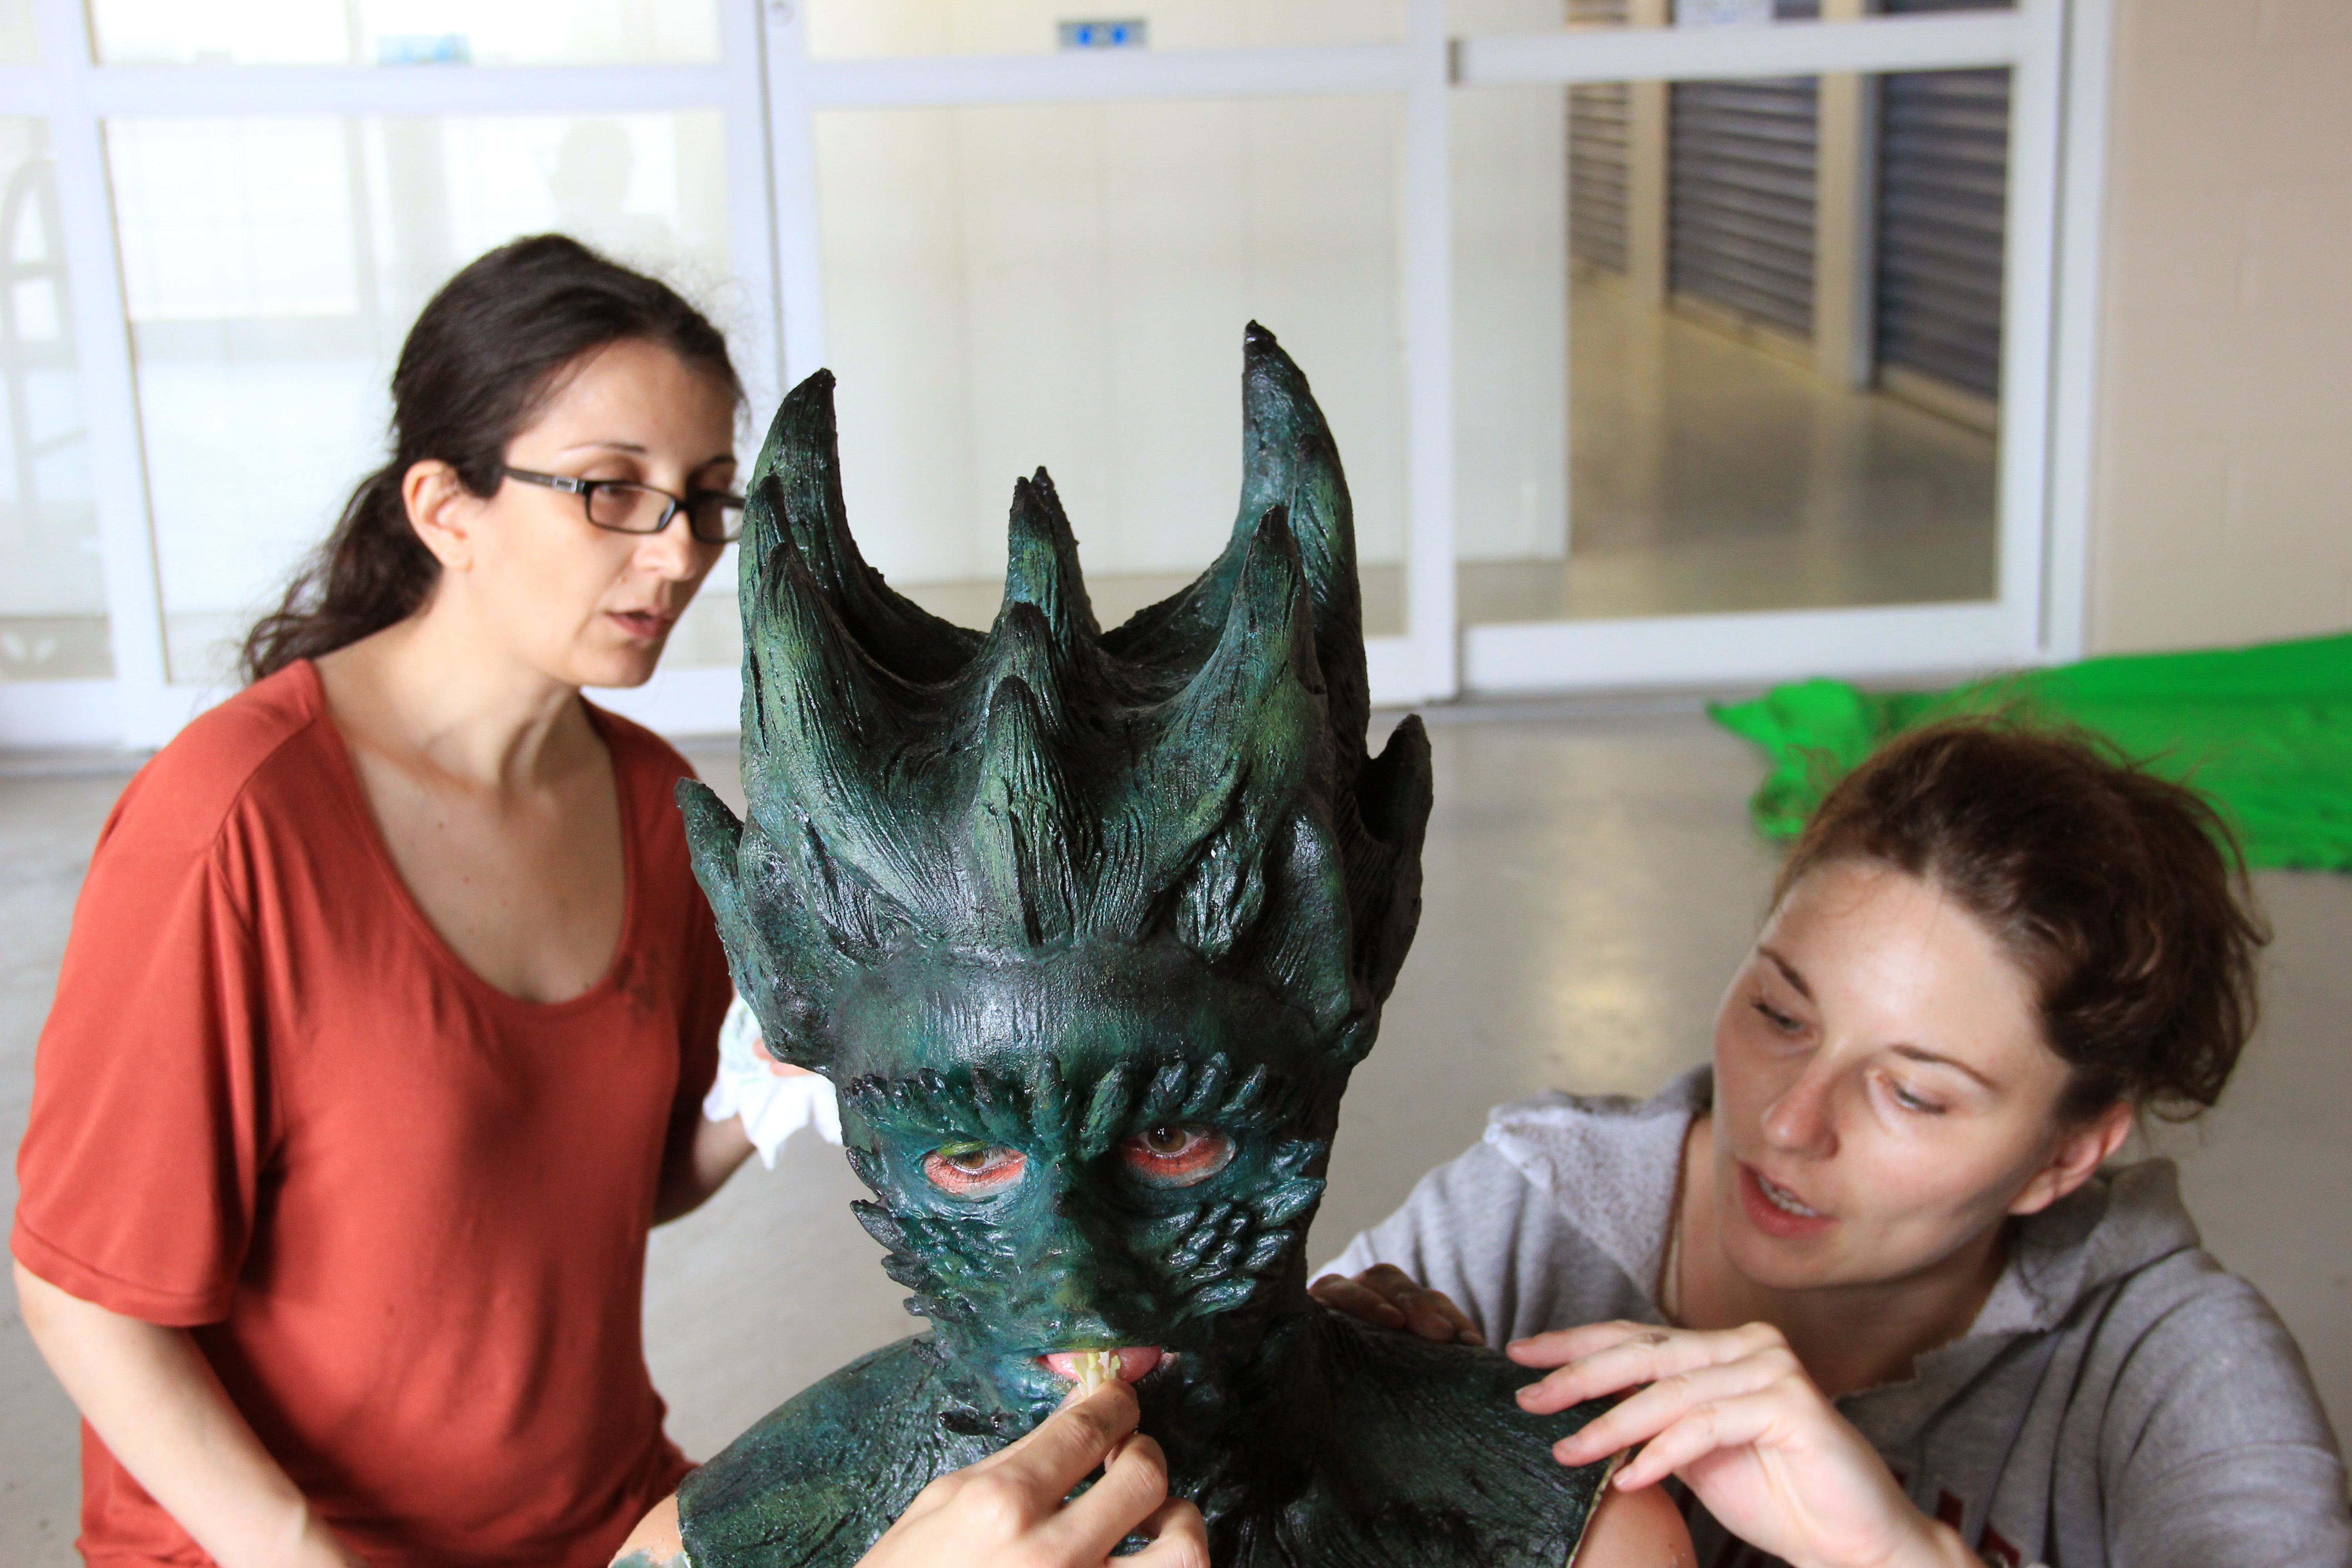
Finally, the day of truth–shoot day. If anyone really believes making movies is a glamorous past-time, let me shatter your misconception for you. We had to bring the actress in SIX HOURS early, so that Christine and Ciara Rose Griffin, another talented makeup artist, could put it all together and turn the very talented Virginia Logan into a hideous creature.
They painstakingly glued everything to her with Skin-tite and Prosaide, skillfully blending all the pieces together as they went along. It was a torturous process for Virginia to undergo, but she held up like the complete trooper she is!

Finally, here she is, along with FX contacts and monster teeth, wrecking mayhem on the set!
We’ll probably add some CG enhancements to make her even more horrible, twitching tentacles, that sort of thing.
See the gallery below for more pictures of the whole process…

Medical MisAdventures
 So Sunday we had a crazy day shooting in Voorhees, NJ at a plastic surgeon’s office. We braved a two hour drive through the pouring rain, Burger King breakfast food and hospital booties (the ones you pull on your feet,okay?) in order to shoot some complicated hospital scenes.
  Also, there was a life signs monitor that Virginia Logan was attached to that keep beeping and telling us she was no longer respiring. I think it was a malfunction because as of today she was still walking around and making lascivious comments!
  Anyway, we made most of our day and then we nearly hydroplaned on a sharp turn into two other cars that had already spun off the road.
  Somehow I was able to channel my mad driving skills and turned into two skids, all the while holding one cup of coffee, thereby avoiding the upset-looking Hindu woman we were skidding towards.
  The gods of filmmaking were with us on the that day, I can tell you! All in all, adventures like this are the thing I like least about filmmaking. Still, it does build nerves of steel, if one survives the ordeal. Indie filmmaking is rarely pretty, rarely glamorous and always an adventure….
